Licensing #
- The LPU will come from Polywell flashed with the golden image.
- Connect an Ethernet cable to the LPU.
- Add :6111 to the end of the IPV4.
- Fill out the information as listed below:
- Full name: HunterDunbar
- Organization: FlashParking
- Email : Visionuncanny@gmail.com
- Product key: Obtain from Uncanny
- Go to the Uncanny portal – Uncanny Surveillance.
- If you do not have a login, please reach out to @Hunter Dunbar or @roberto.salas.
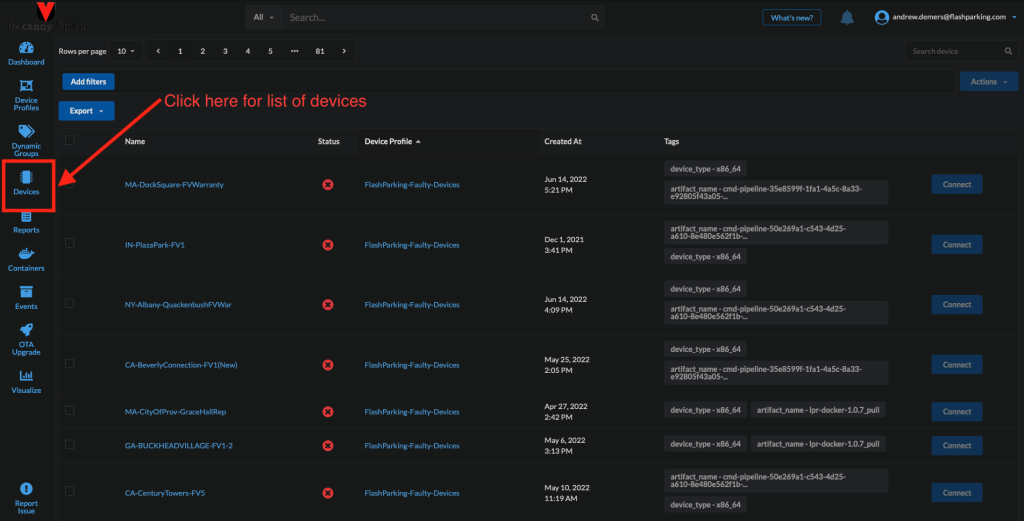
- Find your device in the Devices tab
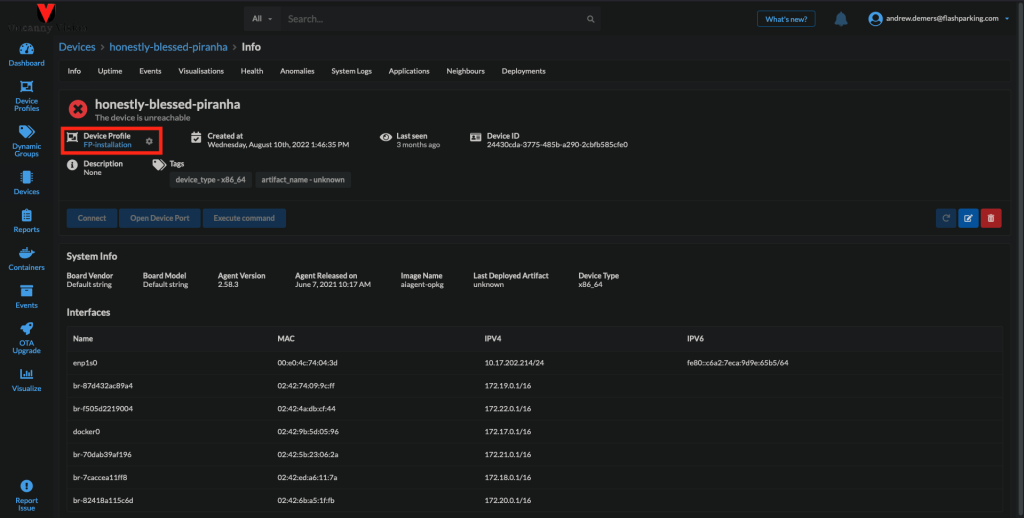
Change the device profile from FP-Installation to FlashParking-LPR by clicking the gear icon next to Device Profile.
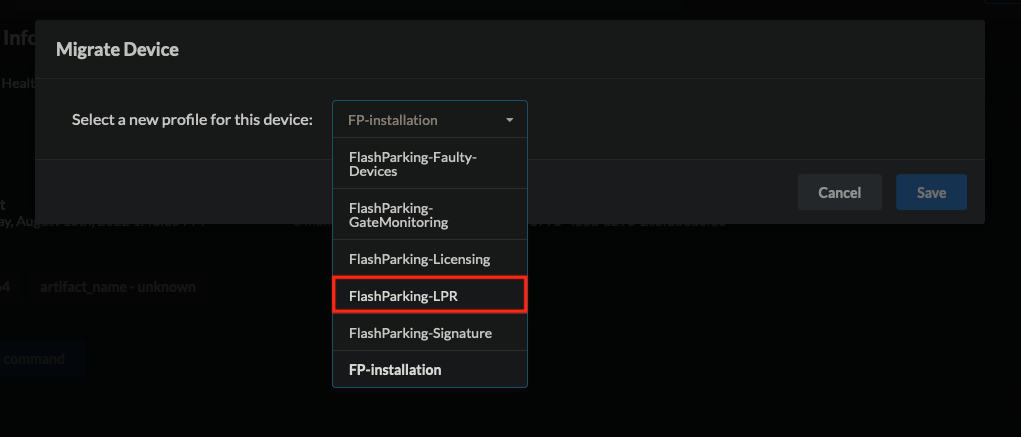
- Click save. The controller will then reboot. After several minutes, refresh the page to see the updated device.
Final LPU Steps #
- The next steps will run two scripts.
- The first script is used to run the multiple docker containers as a single service.
- The second script changes the hostname, installs LogMeIn, enables device uptime monitoring, and enables the Watchdog service.
- Click on Connect > Open Terminal in Browser.
- Username: user
- Password: flash123
- Next type the following:
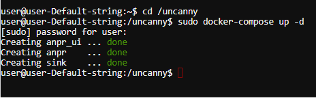
cd /uncanny
sudo docker-compose up -d
cd /tmp
wget https://www.dropbox.com/s/v735do6v77627l6/install.sh
sudo bash install.sh
The script will take you through the following list of questions:
- What would you like to name this device?
- The name should be the same as the lane
- Would you like to enable the watchdog device?
- Answer “n” for now
- Would you like to install LogMeIn?
- “y”
- Would you like to enable device monitoring?
- If yes, follow the directions here:????

LPU Configuration is now complete.
Camera Configuration #
- Ensure all cameras are on the same network as the LPU(s).
- Go to the camera page – Uncanny Surveillance.
- Find the LPU you would like to configure.
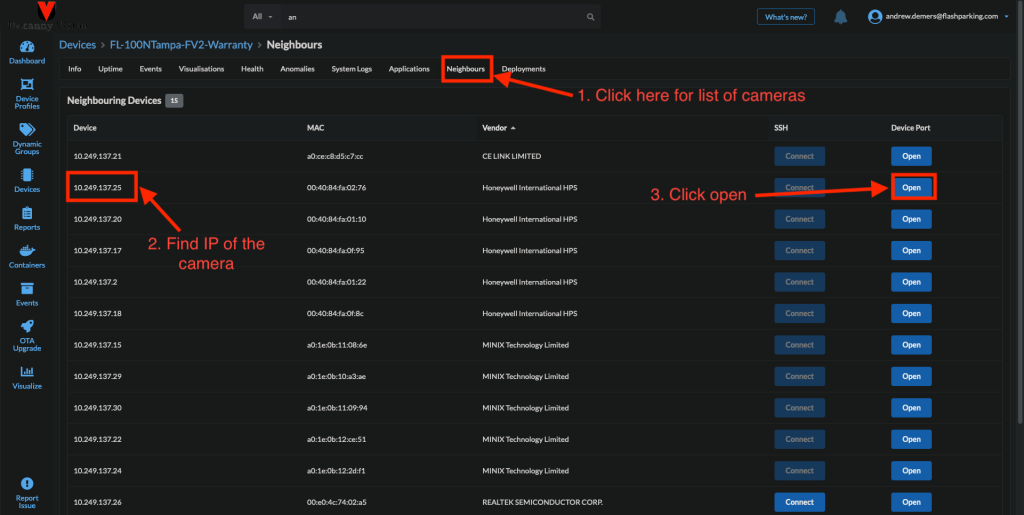
- Navigate to the Neighbors tab.
- Search for the IP address of the camera you want to configure and select “Open”
- If using the default camera, “Honeywell International HPS” should appear in the Vendor column.
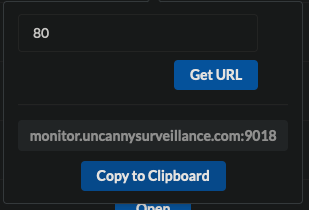
- Click Get URL. The default port is :80
- A URL will be generated. Copy and paste this URL into your browser.
- You will now be at the camera login screen. The login credentials are as follows:
- username: admin
- password: Flashparcs1!
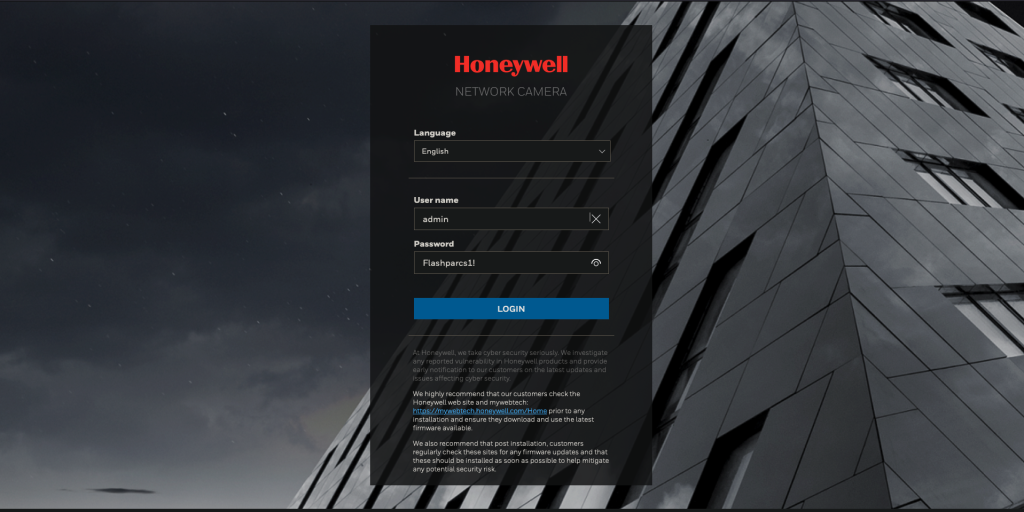
- The homescreen should show a live view of the camera feed.
System Setup #
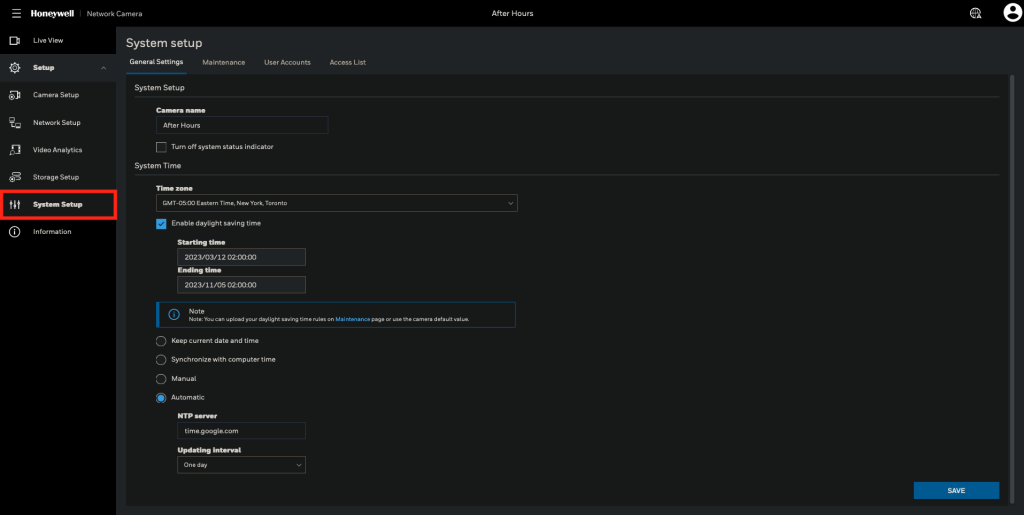
- Click on Setup → System Setup
- Under General Settings, set the following:
- Camera Name: Should have the same name as in LogMeIn.
- Time zone: This should match the timezone the camera will be installed in.
- Check enable daylight savings time
- Select Automatic
- NTP server: time.google.com
- Click SAVE in the lower right-hand corner.
- Under General Settings, set the following:
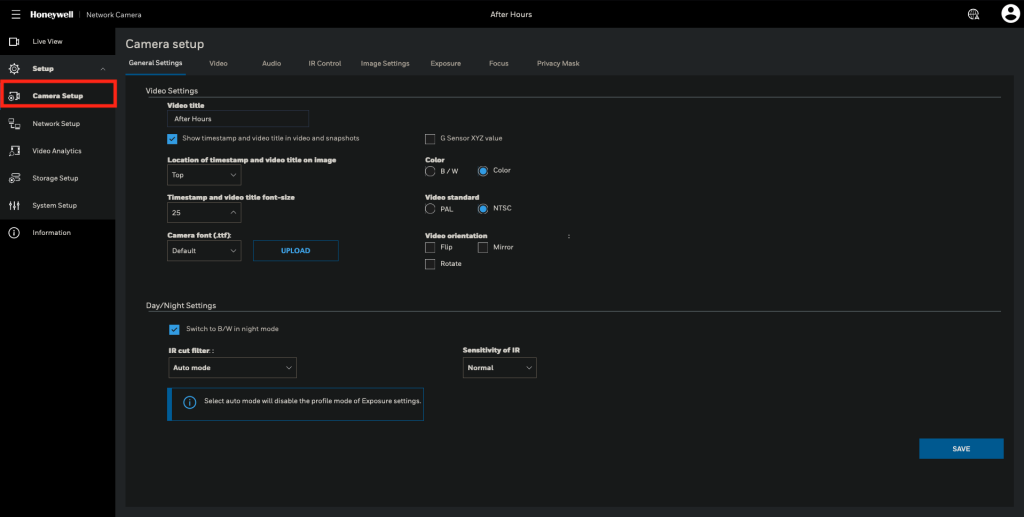
General Settings #
- Now click on Camera Setup → General Settings
- Video title: The lane name
- Do not use the full LogMeIn name as it takes up too much space.
- Check Show timestamp and video title in video and snapshots
- Timestamp and video title font-size: 25
- Day/Night Settings
- IR cut filter: Auto mode
- Click SAVE in the lower right-hand corner.
- Video title: The lane name
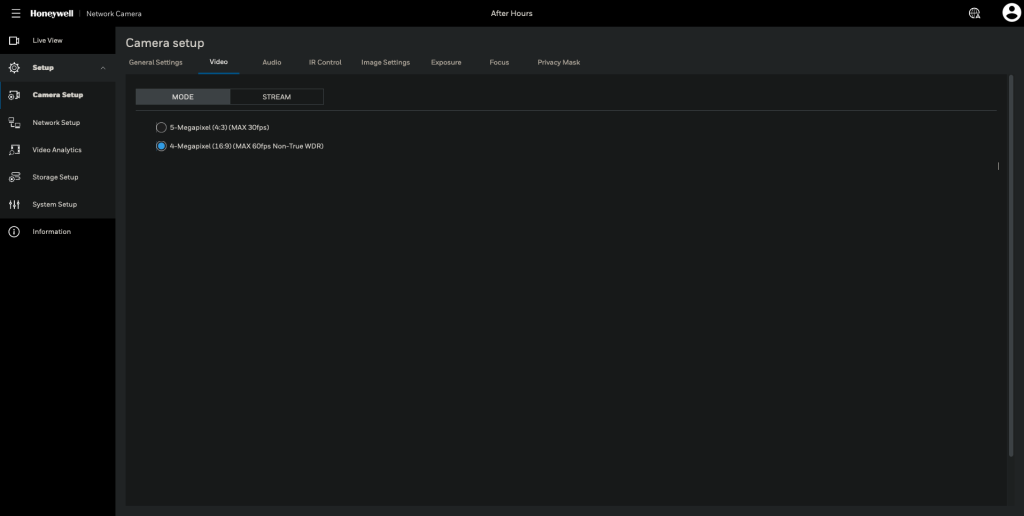
Video Settings #
- Camera setup → Video
- Mode:
- Select 4-Megapixel (16:9) (MAX 60fps Non-True WDR).
- Mode:
- Stream → Video settings for main stream:
- Select H.264 (Default)
- Frame size: 1280×720
- Maximum frame rate: 12 fps
- Bit rate control: Fixed quality
- Quality = Excellent
- Click SAVE in the lower right-hand corner.
- This must be repeated for each camera connected to the LPU.
