These final set up steps are completed by the Vision team Contact Robert Salas for inquiries.
LPU Configuration #
Adding Cameras #
- Go to the Uncanny portal – Uncanny Surveillance
- Click on Devices in the left column.
- Search for the device you want to configure.
- Click on Open Device Port. Type 9090 for your port and click Get URL.
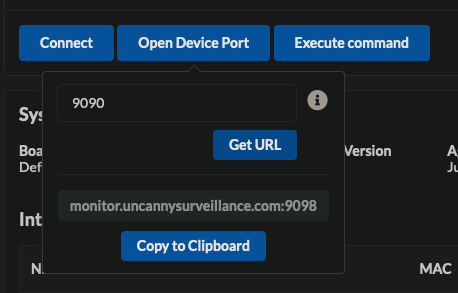
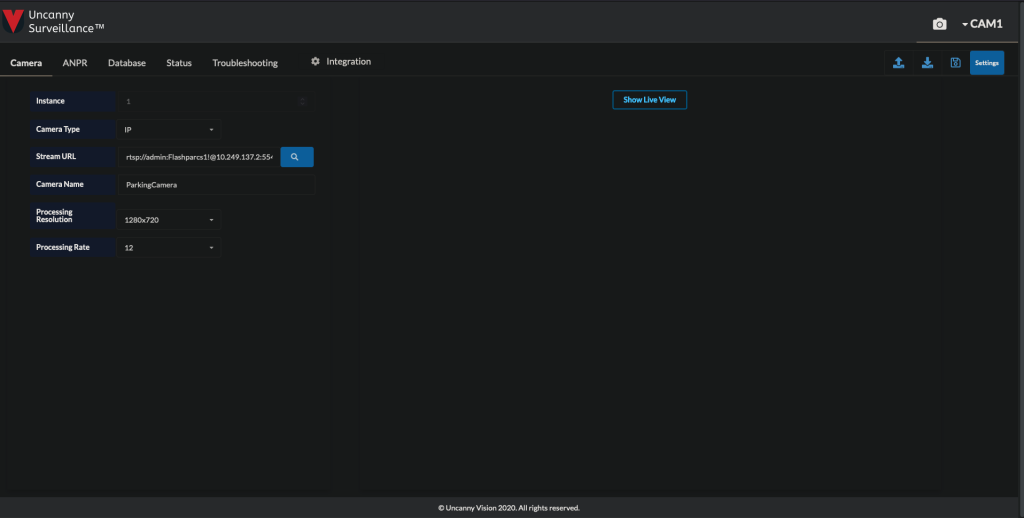
Copy this URL and paste it into the browser. You should see the following page:
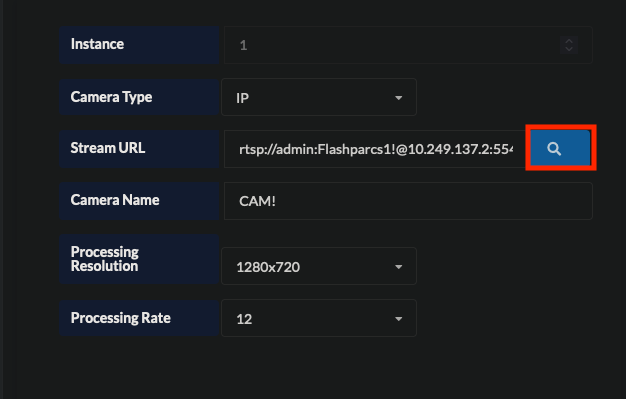
- Click on the blue search icon to see a list of available cameras on the subnet.
- Note: All cameras MUST be on the same subnet as the LPU
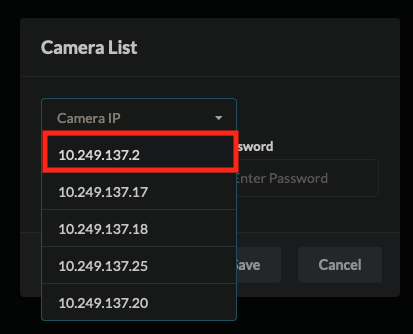
- Find the IP of the camera you would like to pair to the LPU.
- Enter the following credentials for the camera:
- Username: admin
- Password: Flashparcs1!
- Then click Save.
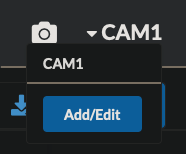
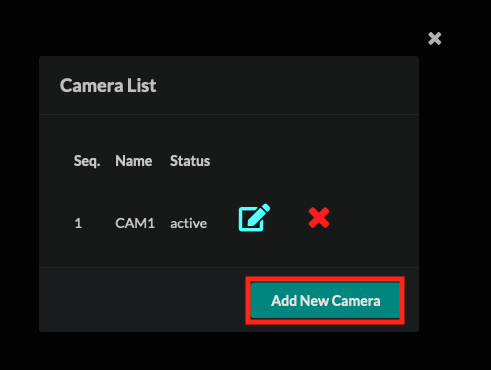
Click on CAM1 → Add/Edit at the top right.
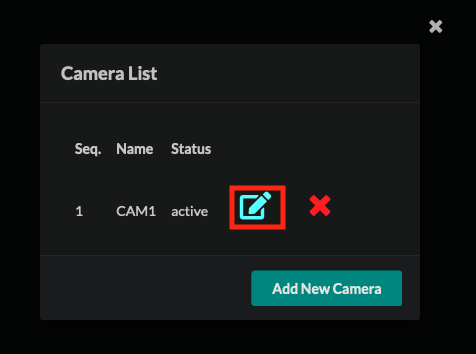
Click the edit icon and rename the camera to the name you set in the Video Title field.
- Now click “Show Live View.” You should see frames from the camera feed.
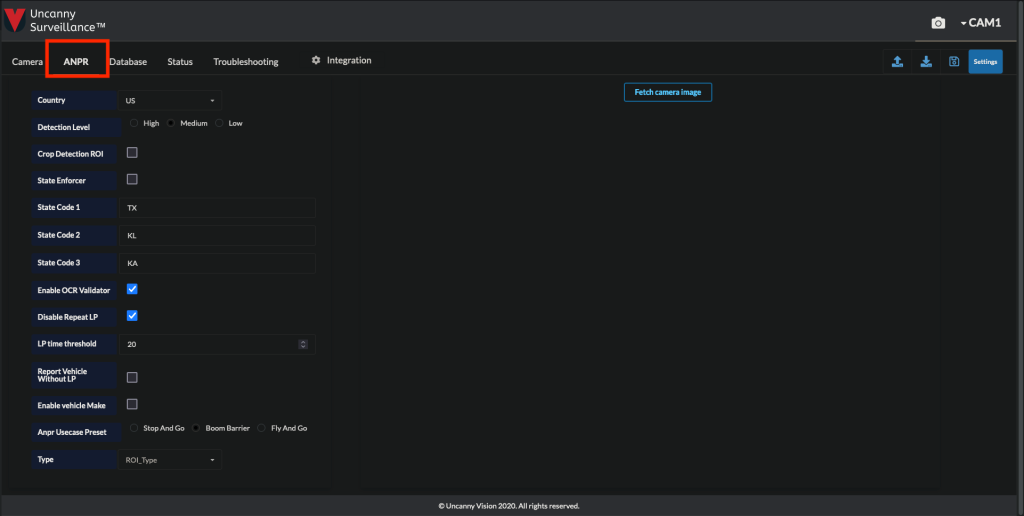
- Click on the ANPR tab.
- Configure these settings as follows:
- Default Country: US
- Check Enable OCR Validator
- Check Disable Repeat LP
- Anpr Usecase Preset: Boom Barrier
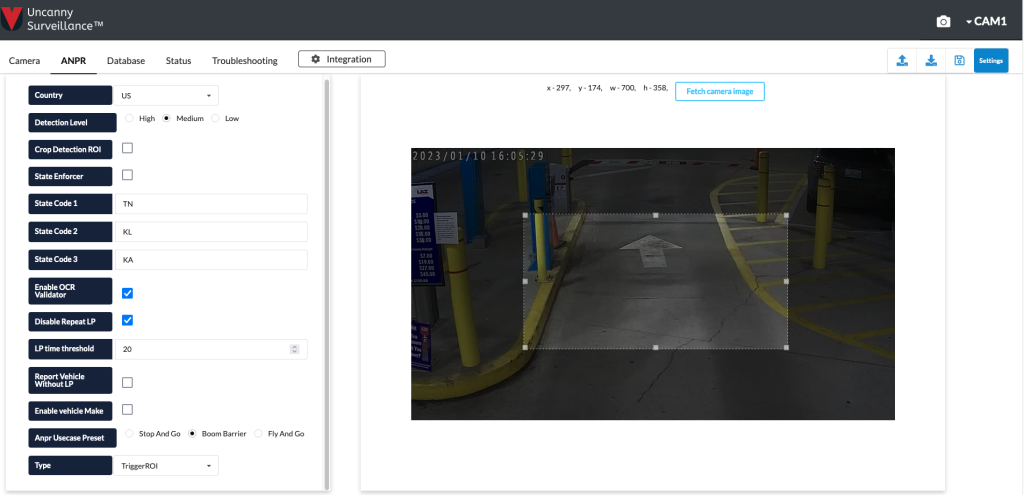
- Next we will set the regions of interest (ROI). There are three different ROIs explained below:
- DetectionROI: this should be anywhere the vehicle could be seen. Most of the time, it will be the entire view of the screen.
- PreferentialROI: this is where the model will look for a license plate – you should pick the most ideal location where we want to detect the plate. This should typically be in the middle of the screen and may cover most of the screen.
- TriggerROI: this region triggers the event to fire to the kiosk. It should be the smallest region.
- Click on Fetch Camera Image. An frame from the camera should appear.
- Drag the box to set each ROI according to the descriptions above. It is helpful to have a vehicle in the lane.
- Now click the Database tab.
- These settings will depend on the type of lane the camera is in.
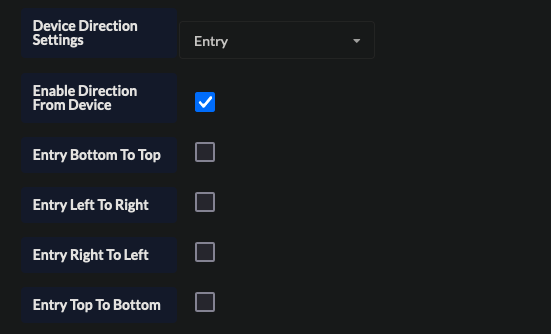
- For an entry lane:
- Device Detection Settings: Entry
- Check Enable Direction From Device
- For an entry lane:
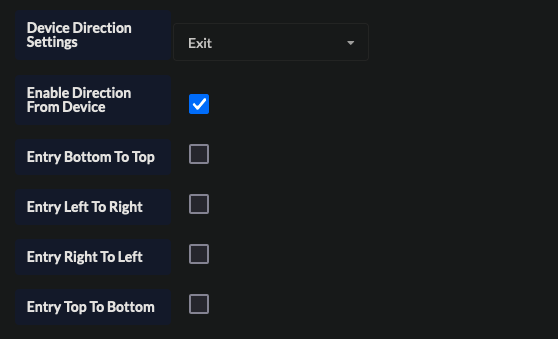
For en exit lane:
- Device Detection Settings: Exit
- Check Enable Direction From Device
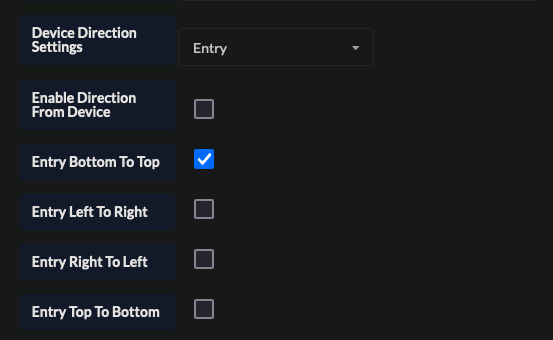
For a Reversible Entry:
- Device Detection Settings: Entry
- Check Entry Bottom to Top
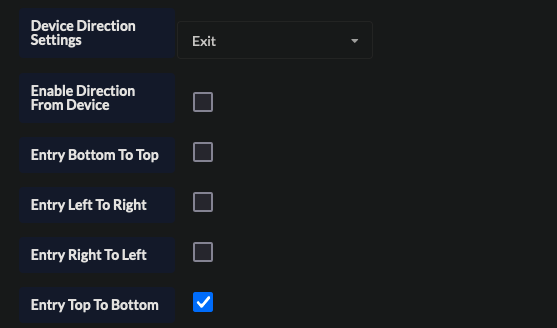
For a Reversible Exit:
- Device Detection Settings: Exit
- Check Entry Top to Bottom
- Add the controller’s IP to the Reconciliation IP field at the bottom of the Left Column.
- This IP will be the same for all cameras in the same garage or logical zone. If there are multiple controllers at one site, they will all have to reconcile to the same IP (the “Master Controller”).
- If there will be more than one camera on this controller, click on the Add/Edit button in the top right corner and select Add New Camera.
- Repeat the above steps for each camera added to the controller.
Additional Configuration Settings #
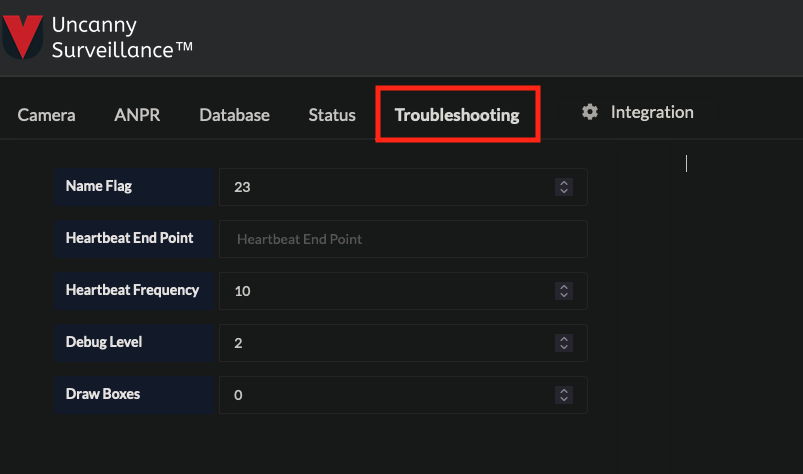
- Once all cameras have been configured, click the Troubleshooting tab and configure the following settings:
- Name Flash: 23
- Debug Level: 2
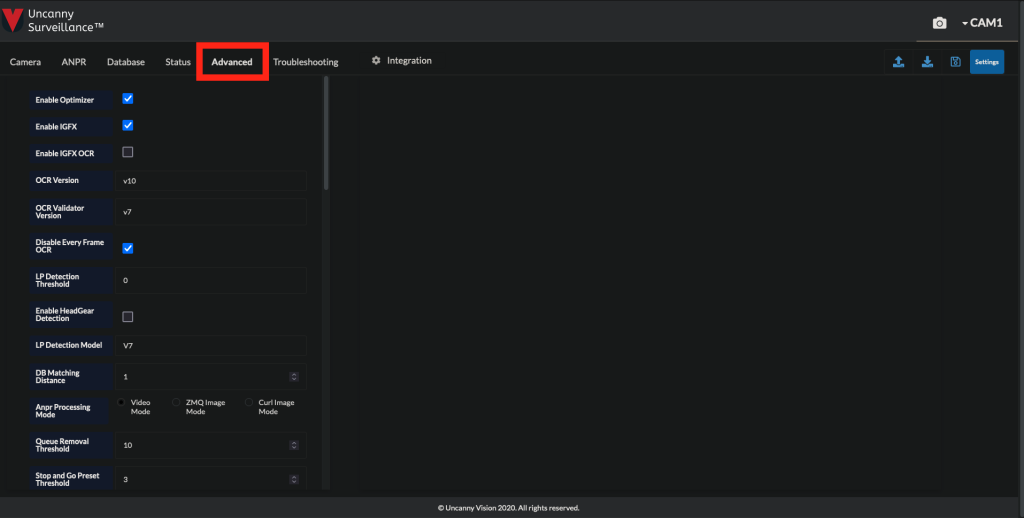
- Hold CTRL + ALT + U to enable the Advanced tab.
- Configure the following settings:
- OCR Version: v10
- OCR Validator: v7
- LP Detection Model: V7
- IMPORTANT: Click the Save icon at the top right corner of the screen. The application will then restart and no changes can be made for 1 – 2 minutes.
- Back at the Device page, edit the description to include the lane names and IP addresses of the cameras connected to the LPU.
Final Controller Portal Settings #
- Navigate back to the Devices page.
- Find the Device you would like to configure. Then hit Open Device Port, type 820X, where the X is the LPR instance 1 – 4.
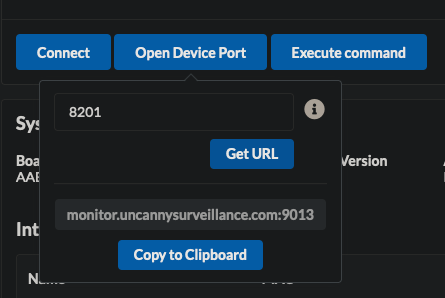
- Click Copy to Clipboard, then paste in a new tab.
- Select the Integration tab.
- Enable Integration
- In the Client URL, replace the IP address with the IP of the kiosk.
- http://<kiosk_ip>:10002/api/lpr
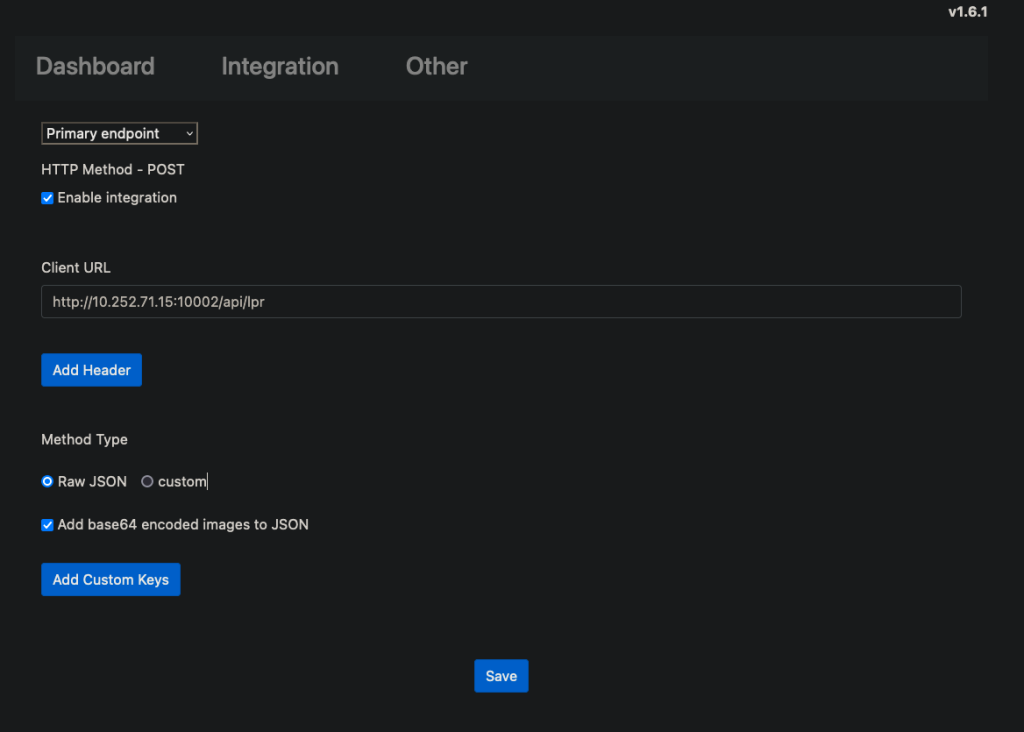
- Click save
- This will need to be repeated for each instance of LPR.
Flash Admin Portal Config #
Kiosk Settings #
Once all of the above has been completed, the final step is to enable LPR on the kiosk.
- Navigate to the location in the Flash Admin Portal
- Click on FlashPARCS > the kiosk you are adding LPR to.
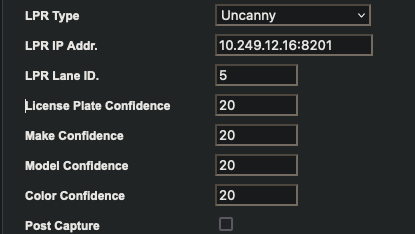
- Set LPR type to Uncanny
- Set the LPR IP Addr. to <LPU_IP>:820X, where LPU_IP is the IP address of the controller and X is the instance you want to add (1 – 4).
- License plate, make, model, and color confidence should each be set to 20.
- If post capture is being used, check the Post Capture option.
- Scroll down and select Save.
- Open the all kiosks command prompt and disable the Windows Firewall rules:
netsh advfirewall set allprofiles state off