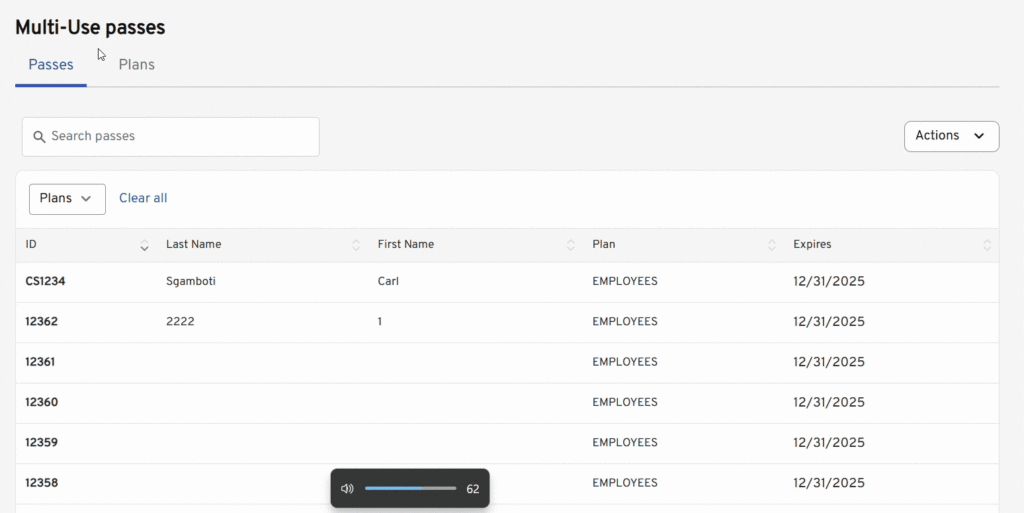
The Multi-Use Passes feature in the ZipPark portal enables users to assign passes that can be used a certain number of times, depending on the configuration.
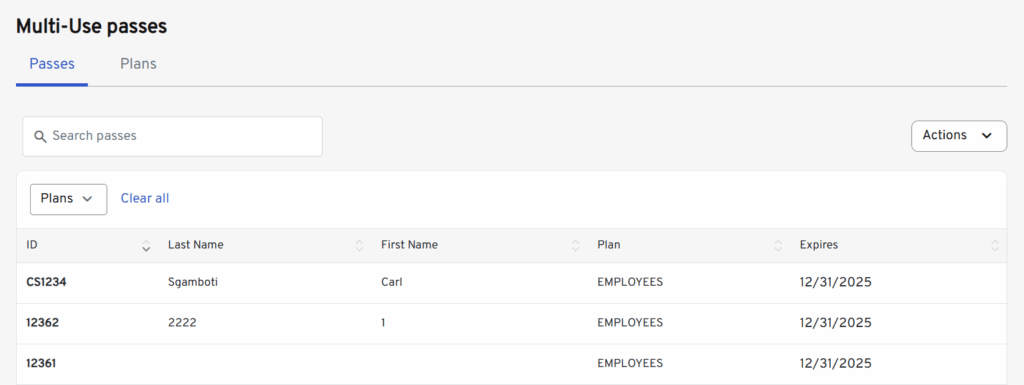
- ID: A unique identifier for the pass, also used as the barcode.
- Last name: Optional field; can be left blank.
- First name: Optional field; can be left blank.
- Plan name: Required; must exactly match an existing plan name in the system.
- Expiration date: Required; must follow the format MM/DD/YYYY.
Implementation #
- When in the Multi-Use passes tab > Actions > Fill out ID and Name > select plan from dropdown > enter expiration date > Add Pass
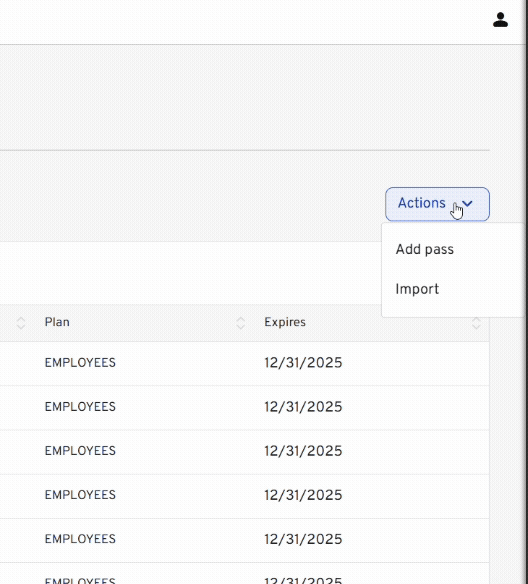
- Aditionally, you can create a new plan by clicking the Plans tab at the top > click the Add Plan button to display the Plan creation tab.
- Single Day: Limits the Multi-Use Pass to a single-day use.
- Event-Specific: Limits the pass to a specific event which must be selected from the calendar.
- Daily Limit: The number of times the pass can be used per day.
- Product ID: Identity ID for the plan.
- Validations: This dropdown allows the user to select a validation to be integrated with the plan. Everytime the Multi-Use Pass is scanned to be charged, the validation will take place along with the payment selected for the Pass.
- Allowed Locations: Limits the Pass to be used in any marked lots.
Add Plan to Event #
If the Event-Specific flag has been checked at the time of Plan creation, users can add the Plan to an event displayed in the Calendar.
- Click the Event Calendar tab and select the desired event > Then click the Multi-Use Plans tab at the top and click the Add Plan button > Select the plan from the dropdown and click on Add Plan.
Note
Limits can also be applied in this instance by filling in the information on the Usage Limitation section when assigning the Plan to the event.
