Parkonect’s Passkit feature allows you to send monthly parkers a QR code they can use as a credential for easy access. Monthly Parkers can save this credential in their digital wallets (Apple Wallet or Google Wallet). This guide provides step-by-step instructions on creating and distributing monthly passes.
Requirements #
The monthly account must be active.

Generate Passkit Enrollment Link #
1. Log in to Passkit.
Username: john.oconnell@flashparking.com
Password: P@rking123!
2. Select the Company the garage is associated with (e.g., Parkonect).
3. Go to the Distribution tab and click Share.
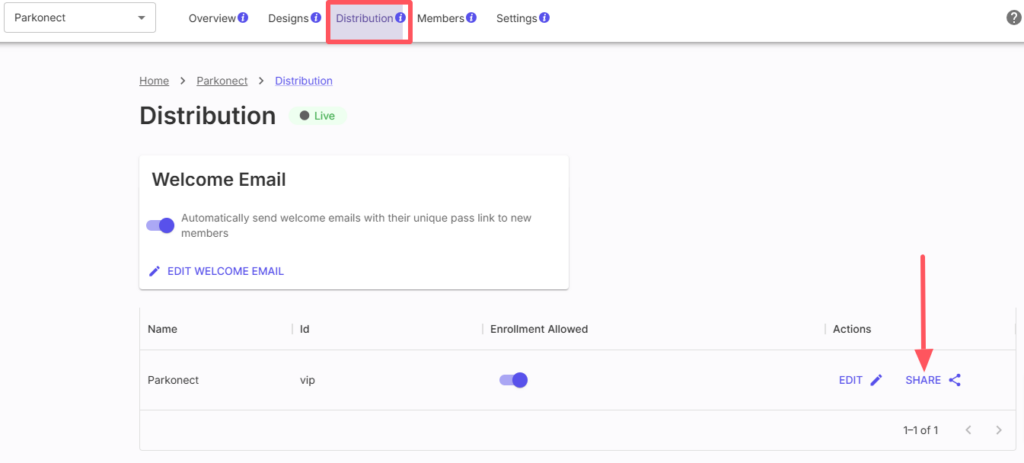
4. Copy the link and share it with the parking operator.

Create Monthly QR Code #
These steps are typically performed by the parking operator:
1. Log in to Parkonect.
2. Go to Garage > Garage Setting > Accounts.
3. Select the monthly account for the parker for whom you want to create a virtual pass.
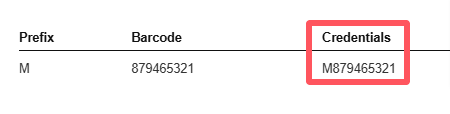
4. Copy the Credentials (M + Barcode, e.g., M879465321).
5. Go to the Passkit Enrollment link.
6. Enter the name, email, and mobile number. Then, paste the monthly parker’s credentials into the Passkit Barcode field.
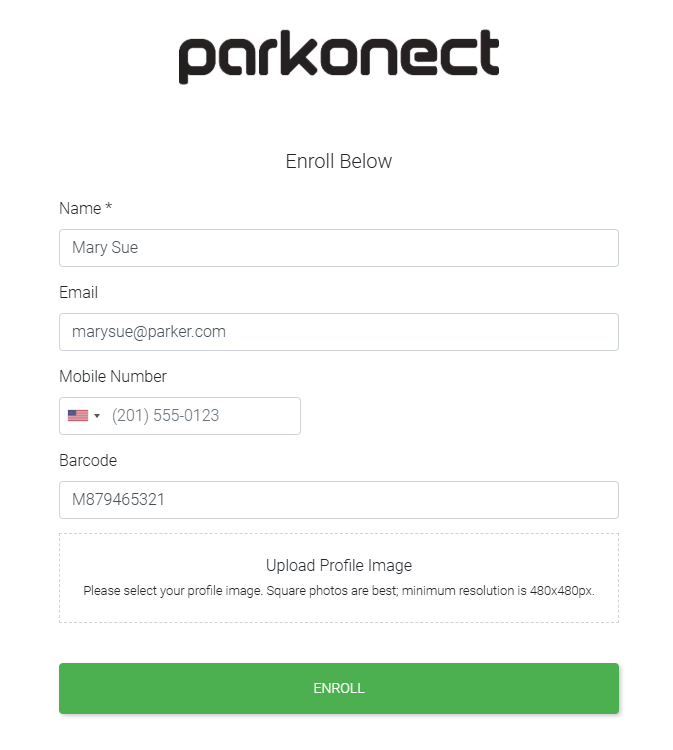
6. Click Enroll.
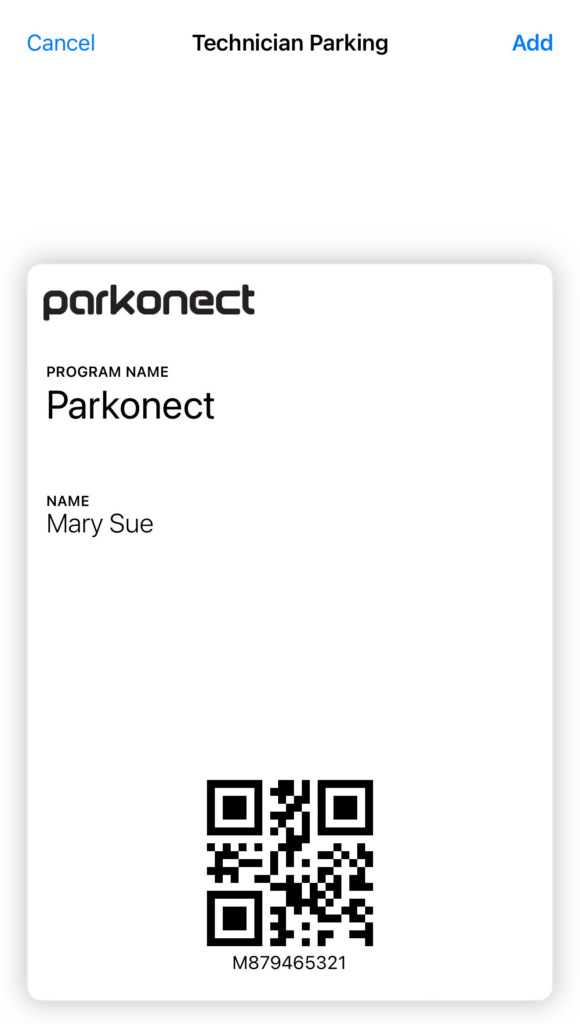
Monthly Parker Experience #
The monthly parker will receive an email, typically found in their spam folder, containing their parking pass.
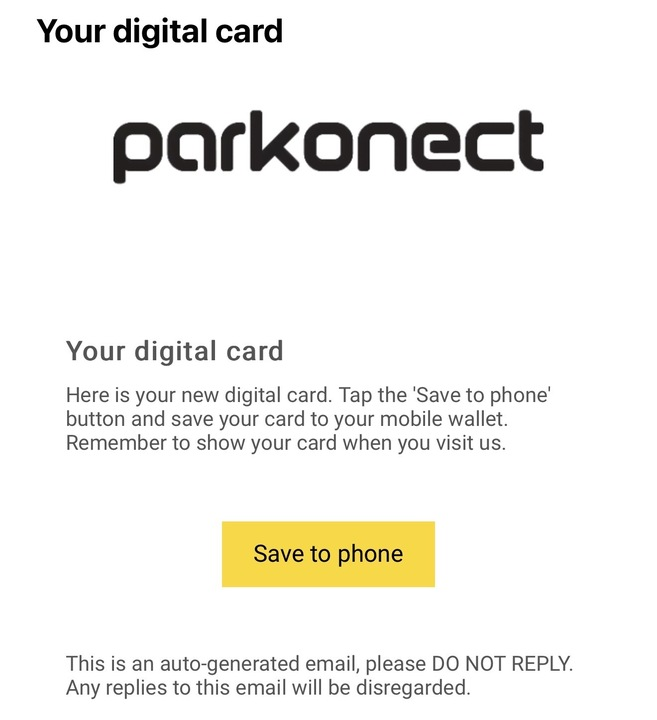
The parker then clicks Save to Phone to add the pass to their digital wallet.
Bulk/Batch Creation by CSV Import #
This method allows you to import data from a CSV file, create digital passes, and optionally email them to recipients. This entire process can be completed in just 10–15 minutes, making it a fast and efficient way to manage a large number of passes.
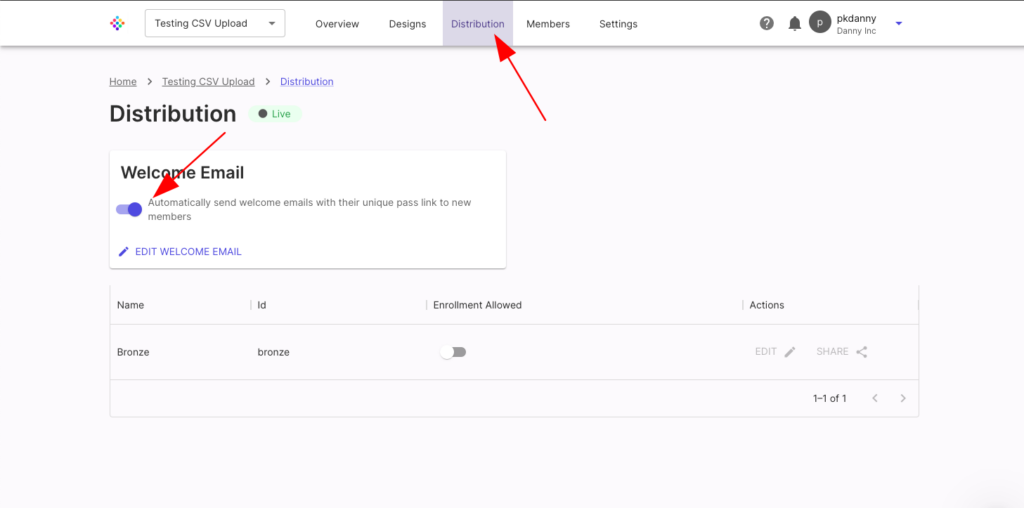
Decide Your Welcome Email Strategy #
Before you begin, decide how you want to distribute your passes. You have two options for the welcome email:
- Enable the welcome email if you want PassKit to automatically send a distribution email with a link to the digital pass.
- Disable the welcome email if you prefer to create the passes now and send the emails later using your own email system.
If you choose to enable the welcome email, make sure to review and confirm the content is correct before proceeding.
Manually Add a Test Pass Holder #
To ensure everything works as expected, create a single test pass first.
- Click “Add Pass” (or the equivalent button for your pass type) in the PassKit portal.
- Enter the details for a test pass holder, using your own email address or one you can easily access.
This allows you to verify the pass design, the welcome email (if enabled), and the overall process before you import a large batch of passes.

Confirm Your Card Design and Welcome Email #
After adding the test member, check the following:
- Confirm you’ve received the welcome email (if enabled).
- Verify the pass looks exactly as expected, paying close attention to the values displayed on the card.
Pro Tip: Test the pass on both iPhone and Android devices to ensure compatibility.
If anything is not as expected, revisit the design, distribution, or settings tabs to make adjustments. Re-test until you’re satisfied.

Do not proceed until you’re happy with the card design, email content and data fields.
Open the CSV import pop up #
When you’re ready to import your data:
- Navigate to the main table for your pass type (e.g., the Members Tab for Membership and Loyalty Cards, Coupons Tab for Coupons, and the Tickets Tab for Event Tickets).
- Click the “Import CSV” button to open the import window.

Add your CSV File #
Upload your CSV file by either dragging and dropping it or clicking to select it.
Important Notes
- Your CSV file must include a ‘Tier’ column, as this is a required field. The ‘Tier’ field holds the Tier ID for your membership program.
- If you’re using profile images on your membership cards, ensure one of the columns in your CSV contains a publicly accessible URL linking to the profile image (e.g., the image stored on Google Drive). This URL must be accessible for PassKit to create the pass successfully. (e.g. https://drive.google.com/file/d/1ihEic9xnhNw9UCQPNl8YS-AJfI5pGCNs)
- PassKit will display the first 5 entries of your CSV file for confirmation. Click “Next” to proceed.

Map your data #
In this step, map the data from your CSV file to the corresponding fields in PassKit. Ensure each column in your CSV aligns with the correct field on your membership card.
Profile Image URL Mapping #
If your CSV includes a column with profile image URLs, ensure this column is mapped to the profile image field during the mapping step. This ensures the images are correctly assigned to each member’s digital card.

Review and Submit #
After mapping your data:
- Review the data mapping to ensure accuracy.
- Click “Submit” to complete the import process.
Important: If your program is configured to send a welcome email, all members in the CSV file will receive an email as soon as you click “Submit.”

Review Import Results #
After submitting, you’ll receive an email with two files:
- success.csv: Contains a new column with the Pass ID for each successfully imported member.
- error.csv: Lists any rows that failed to import, along with the reason for the error.
Next Steps:
- For members in the error.csv file, review the errors, correct the issues in a new CSV file, and repeat the import process from Step 5.
- Continue this process until the error.csv file is empty, indicating all members have been successfully imported.
Additional Recommendations #
Test with a Small Group First
When importing a CSV for the first time, we recommend testing with a small group (e.g., a test group or just one row with your details). This allows you to verify that the fields are mapped correctly and that the profile image works (if used). Once you’re confident everything is set up correctly, you can proceed to import larger CSVs.
Break Down Large CSVs
For large CSV files, we recommend breaking them down into smaller files (the maximum size for a CSV is 4MB). This ensures smoother processing and reduces the risk of errors during import.
CSV File Example
