Please see the main document for the USAePay Payment Gateway here.
Credit Card Payments #
To enable credit card transactions for any location, the customer must provide their merchant account information. This information is then submitted to USAePay through their portal. USAePay then provides credentials that allow us to link the account in the Flash Admin Portal. Once the account is linked to the Portal, it can be added to the location. Follow the steps below to complete this process.
Collect Merchant Account Information #
Provide the customer with our VAR Sheet and ask them to follow all instructions therein. If they do not have a merchant account provider, we have a preferred vendor who can assist the customer with obtaining a merchant account:
Sean McGrail
Integrity Merchant Solutions
smcgrail@integritymerchantsolutions.com
(866) 257-3250 x302
Submit VAR Sheet Info to USAePay #
USAePay Reseller Control Panel, click Add Merchant and complete the following sections:
- Reseller Contact Info
- Set Email to support@flashparking.com

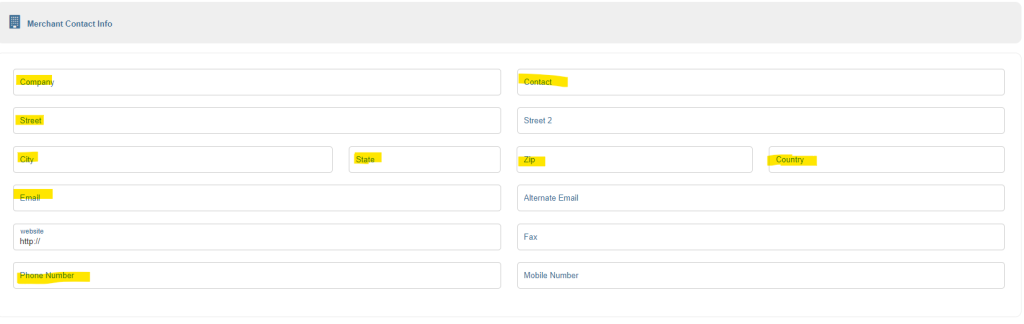
2. Merchant Contact Info
a. Complete Merchant Contact Info section with information from the VAR sheet.
3. Processing Platforms
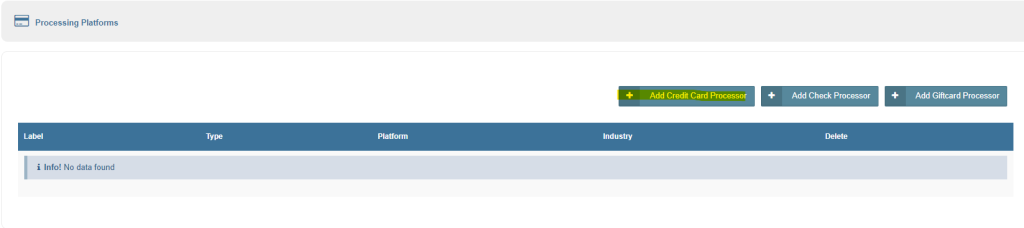
- Select “Add Credit Card Processor” and a window will pop up to Set Platform to the merchant platform for which the customer provided information (e.g. FMDS, TSYS, Paymentech, etc.)
- For FDMS Nashville use First Data Nashville (DLHost), for FDMS Omaha use FDMS North
- Set Industry to Retail (Swipe).
- Complete the Platform information with information from the VAR sheet.
- For First Data Nashville, set Version to 4.0
- For TSYS, MeS, or Heartland Platforms, the additional Merchant Name, State, City and Zip must be completed in order for transactions to process successfully. For Heartland and MeS, enter City name in the Customer Service Phone # form line.
- For Vantiv accounts, choose the WorldPay (Vantiv) platform.
- For Global set Version to 2.1
4. Batch Settings
- Set Auto Close Batches Every: to Specific Time
- Set the time to match the Operating Window from the Location Details in the Portal. Note: The Operating Window time must be converted to PST. If the Operating window is 2 and the location timezone is Central Standard Time, then enter 12:00 AM in this section.
- Set Send Batch Errors To: to support@flashparking.com.
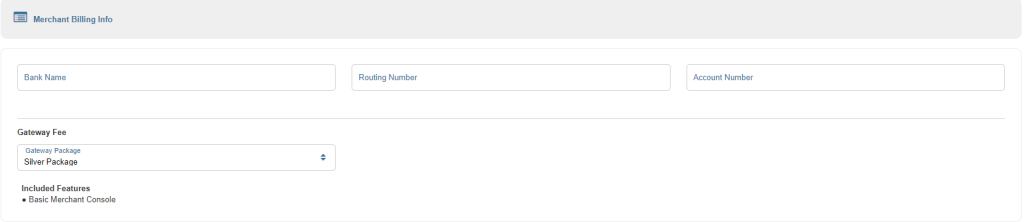
5. Merchants Billing Info
- Set Gateway Package to Silver
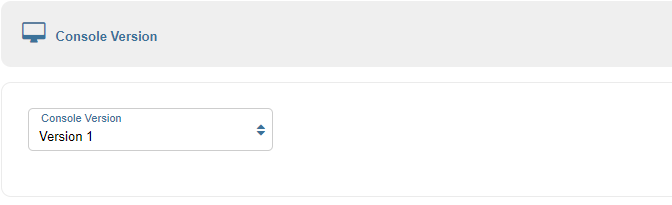
6. Console Version
- Set to Version 1
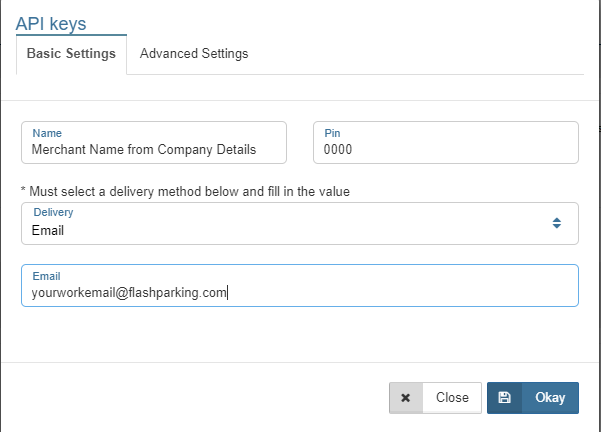
7. API Key
- Set Key Name to Merchant Name and Pin Number to 0000.
- Set On Activation, Email Key To: to your own work email.
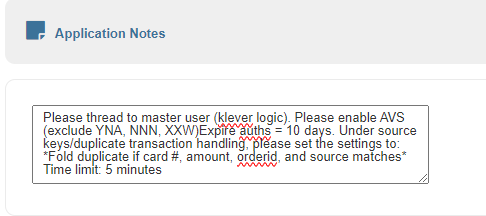
8. Application Notes
- Copy and paste the following:
- Please thread to master user (klever logic). Please enable AVS (exclude YNA, NNN, XXW)Expire auths = 10 days. Under source keys/duplicate transaction handling, please set the settings to: *Fold duplicate if card #, amount, orderid, and source matches* Time limit: 5 minutes
- For Chase Paymentech accounts, add the additional note: PAYMENTECH: Disable AVS!
9. Save the application form.
P.S. Some clients prefer to submit their Merchant Account Information to USAePay directly. In those cases we need the following:
- USAePay Key
- USAePay PIN
- Batch End Hour (PST)
Make sure to include the disclaimer: “It is important to note that we will be unable to manage any transactions and your team will assume responsibility for any fraud settings or duplicate transaction handling.”
Testing the Merchant Account #
Once an application is approved, you will receive an email with the merchant account name, source key, and PIN number. You can then test the account and, if the test is successful, add the account to the Portal.
- Review the Source Key email provided by USAePay
- Login to USAePay Merchant Console
- Select the merchant account from the dropdown list and click Explore.
- If the merchant is not listed, forward the Source Key email to resellers@usaepay.com and ask them to “Thread to master account Kleverlogic.” Once they respond that this has been completed, you can continue with the steps below.
- Select vTerminal and enter test credit information, removing any receipt options.
- Cardholder Name: Test Transactions
Card Number: 5563750040479063
Expiration Date: 0625
CCV: 313
Zip Code: 78704
- Cardholder Name: Test Transactions
- Uncheck Merchant Receipt and remove the email in that field.
- Select Process.
- If the transaction was successful, you will receive a Transaction Approved message.
- If the transaction failed, see Troubleshooting below.
- Click the Batch Manager button in the approval message, or click Batches from the menu bar.
- Find the test transactions, and click the check box in the Void column, and click the Process button.
- Confirm you want to void the transaction on the next screen.
- Click the Settings Tab
- Ensure that the Send Batch Reports To and Send Batch Errors To fields are filled in. If they are not, fill them in and click Save.
Adding USAePay Merchant Account to Company and Location in the Flash Admin Portal #
Company Details #
Enter in the API Key information you received in your email inbox from USAepay.
- Select the Company you would like to add the account to.
- Select Company Details, then USAePay.
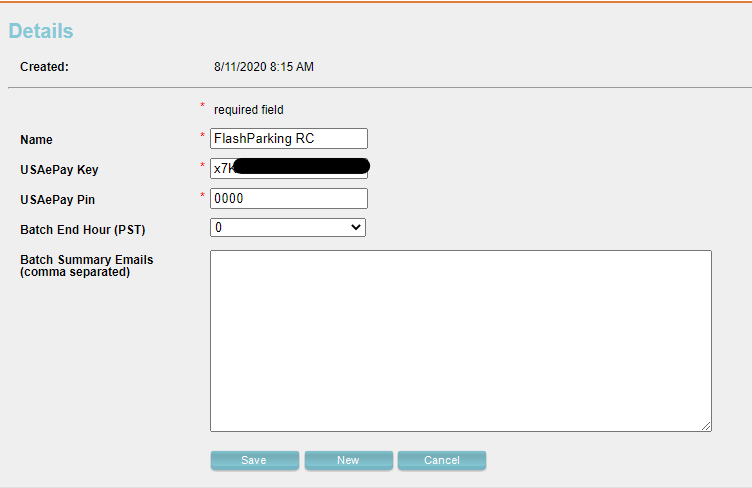
- Click Add New.
- Fill in the Merchant Name , USAePay Source Key, USAePay PIN, and Batch End Hour / Operating Window in PST. Add any email addresses provided in the Discovery Form in Batch Summary Emails.
- Click Save when completed.
To select USAePay as the desired payment gateway at the company level, look for the USAePay dropdown in the Details page of the company, by selecting the dropdown a list of available payment gateways is displayed, simply select the one desired and click Save.
Location Details #
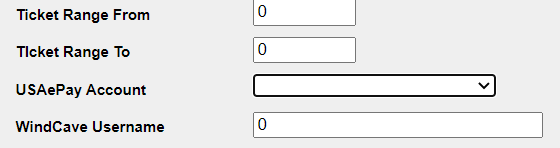
- Select the Location you would like to add the account to.
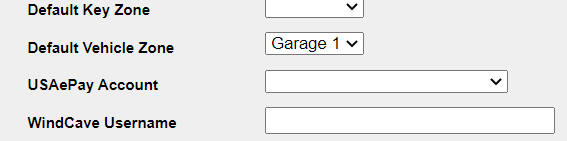
- In the USAePay Account drop-down list, select the account you have added.
- Save the location and confirm that the account is listed.

Additionally, as of ver 3.15.1.0 payment gateways can be selected at logical zone, and ticket type levels. this works in the same way as when selecting the payment gateway at Company and Location levels, simply scroll down to the USAePay Account dropdown and select the desired option, then click on Save.
Note: USAePay Accounts can also be added at the Kiosk level. The Kiosk level setting has higher priority than the settings at the Logical Zone, Ticket Typeor Location levels. This allows having an individual or several kiosks processing payments for a specific merchant account if desired.
EMV / Chip & PIN #
Valet #
The Valet solution uses the MP200 card reader, but still uses USAePay as the payment gateway.
- Must use latest version of FV app (2.8.0.6+)
- Only supports the following merchant account types:
- FDMS / First Data (set ver. to 4.0), NOT FDMS North
- FDMS Rapid Connect (set ver. 2.0)
- Global (set ver. to 2.1)
- TSYS (set ver. to 3.1)
- EPX (set ver. 1.0)
- Vantiv 610 (set ver. 2.0)
- Uses MP200 Hardware
CC Payment Process #
- Pair MP200 with an iOS device through Bluetooth
- Look for the chain-link icon to show connection to MP200.
- Process credit card transaction as normal, using external device when prompted.
- Manual Entry (Credit Card) CANNOT be enabled.
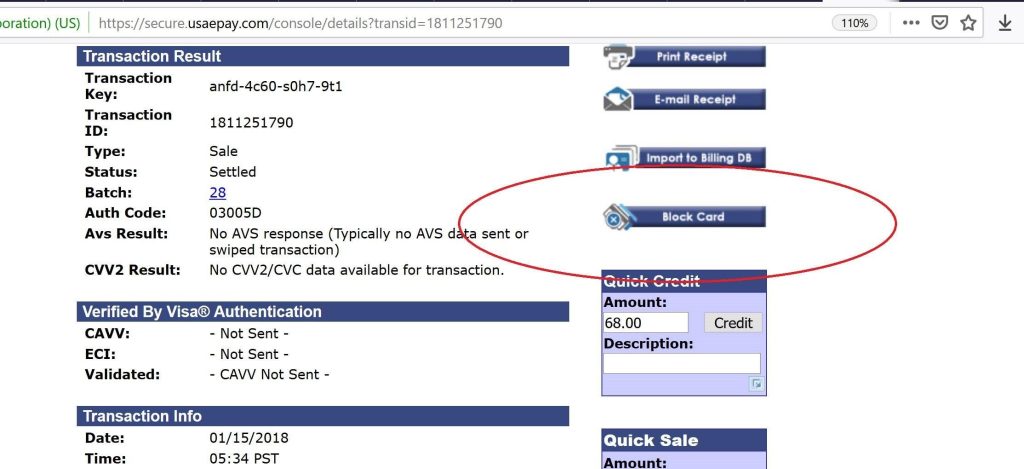
Blocking Cards #
If an operator requests and a supervisor approves, we can block specific parker’s cards from being used at their location. This may be requested if a parker requests chargebacks on their card after parking.
- Login to USAePay Merchant Console
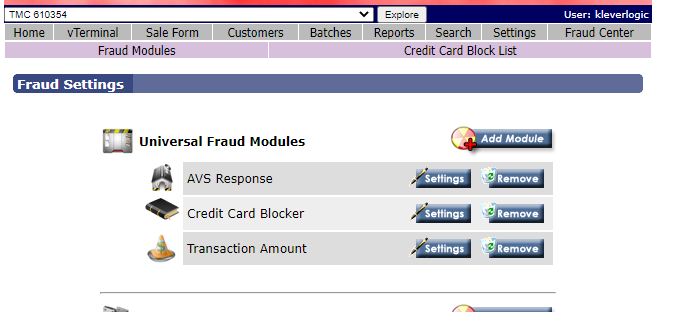
- Ensure that the account has the Credit Card Blocker Fraud Module enabled.
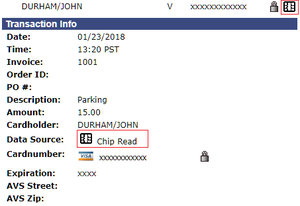
- Search for name or last 4 of parker
- Find latest transaction
- Select Block Card from details
Payment Processor/Platform-Specific Notes #
Global #
- Certain Global VAR sheets will provide a Merchant ID, Terminal ID, and a Bank ID. As the USAePay application only requires the Merchant ID and Bank ID, the Terminal ID might seem extraneous. However, if the test transaction fails try replacing the Merchant ID with the Terminal ID.
Elavon #
- To get an Elavon account to work with USAePay, the customer will need to add TSYS to their account.
- Have them verify with Elavon that the account is a “Parking” merchant account, and not a “Front Desk” merchant account. TSYS cannot be added to the “Front Desk” merchant account, so a new MID will need to be created.
- If they confirm that the account is a “Parking” merchant account and they need to add TSYS to the account, give them the following information: “Call (800) 377-3962 Ext 2, then 2 again. Ask to set up or add TSYS to the account to be able to integrate with the 3rd party payment gateway USAePay.” It will take a couple of business days for the request to be processed, after which the customer needs to call that number back again and request the tear sheet. This sheet should have the USAePay compatible merchant account information.
TSYS #
- If you receive a Hierarchy error when running your test transaction, the issue could be that the merchant account was set up on the wrong TSYS platform. In this case, you would recommend the client check with their merchant account provider and make sure that the account was set up on the TSYS Sierra platform.
- Reference 1
- Reference 2
FAQ – Frequently Asked Questions #
Batch Closure Issues #
USAePay Errors #
- USAePay Errors – list of failure codes returned from credit card platforms.
- You may also visit AVS Result Codes – USAePay Help to see a list of AVS error reference codes
- “Terminal configuration error (130)” – A merchant error that either means terminal is configured wrong or doesn’t exist. Client will need to check with their Merchant to determine the cause.
Supported Platforms / Merchants / Processors #
Supported Platforms can be found here: Partners – USAePay Help
Accepted Card Types #
- Can Flash control card types accepted (Visa, MasterCard, AMEX, etc.)?
- No, Flash cannot allow or disallow card types that are accepted on any hardware device or web-based payment portal. Our payment gateways USAePay and Windcave cannot allow or disallow card types either. This is controlled by the customer’s merchant account provider.
USAePay Version Number? #
Console Version #
- USAePay has two merchant console versions, FlashParking is currently using console version 1.
- Wrong Console Version Selected: if Console Version 2 is selected, the Merchant Account will need to be deleted from USAePay and then resubmitted.
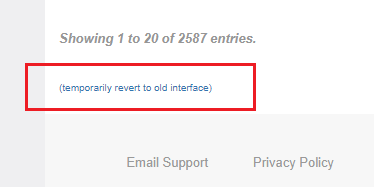
- There is currently a bug that will not allow you to create a new merchant with the same merchant number as a deleted record. The workaround is to create the merchant on the old reseller UI that can be enabled under the “Add Merchant” tab.
- To access the old UI, scroll down to the bottom of the Add Merchant page and click on (temporarily revert to the old interface) before creating the new account. Once that is done, you can revert back to the new interface.
- Wrong Console Version Selected: if Console Version 2 is selected, the Merchant Account will need to be deleted from USAePay and then resubmitted.
Platform Version #
If the merchant is processing EMV transactions on one of our supported platforms, version numbers are below for each processor.
- First Data Nashville: version 4.0
- TSYS: version 3.1
- Global: version 2.1
- EPX: version 1.0
- First Data Rapid Connect: version 1.1
Terminal IDs #
Customers frequently ask how many terminal IDs will be needed for credit card processing. Only 1 Terminal ID is required, but it is up to the customer if they want to setup mulitple terminal IDs to differentiate transactions for their own internal reporting.
Duplicate Processor Detected #
When processing a Merchant Change Request, such as to add or change the version number. If you get a “Warning!: (First Data Nashville (DL Host))Duplicate processor detected.” error this is likely due to the MID used on multiple accounts.

- Be sure to check to confirm the other accounts are for the same company. (in this example, Brand Enhance (Valet) had the same MID for 7 locations)
- To work around this error, go to the Merchants tab and then scroll down to the bottom. Click on (temporarily revert to old interface) and then make the change request.
USAePay Account Hierarchy #
- Monthly Automatic Billing and Monthly Membership Ticket Types, will always use the USAePay account at the Location level (Details tab).
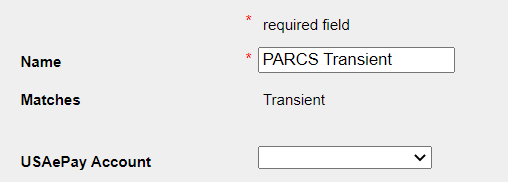
- Valet Ticket Types (not Overnight or PARCS) can have unique USAePay accounts assigned at the ticket type level in order to split revenue between ticket types (this is not a common configuration).
- A USAePay account specified on a Logical Zone that is different than the one at the Location level means that revenue processed at the kiosks in the Logical Zone goes there instead of the account linked at the Location level.
Hierarchy levels are as follows:
Kiosk (Level 4) → Logical Zone (Level 3) → Ticket Type (Level 2) → Location (Level 1)
The system will first look at the level 4 for merchant account settings and continue to work its way up until it finds a merchant account and the payment processing begins. This means that when the parker swipes their credit card at the kiosk, if the smartstation does not have a merchant account assigned to it, then the system will process payment based on the merchant account that’s selected at the Logical Zone. If there is no selected merchant account at the Logical Zone, then the system will look at the Ticket Type of the parker’s ticket for merchant account settings. If there is no merchant for that ticket type then the system will process payment based on the Merchant Account configured at the Location Level.