| CPQ Info | SAAS-INT-PARKWHIZ |
| Dev Task | n/a |
| Configuration Access | Parkonect Admin, ParkWhiz Admin |
| Firmware Version Requirement | |
| Known Limitations | n/a |
| Also known as | Parkonect PreSales |
| Sales and Marketing Assets | n/a |
| L&D Course |
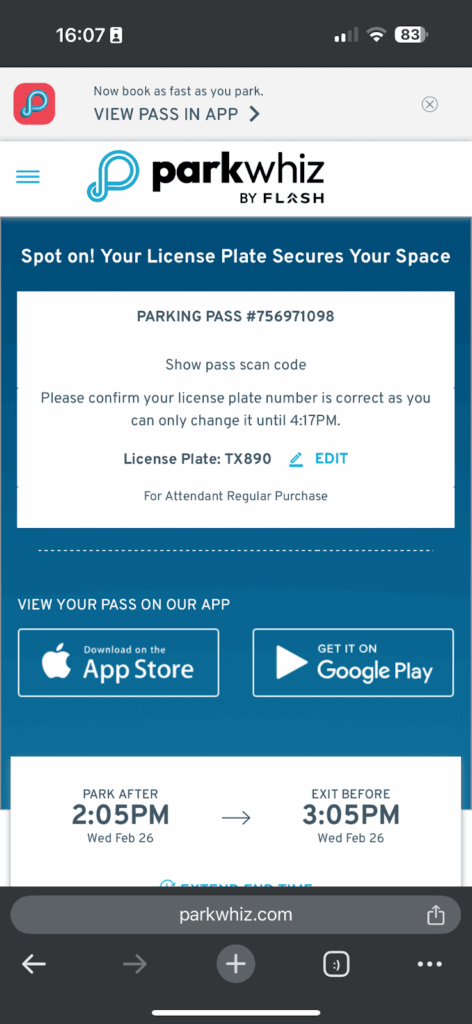
ParkWhiz reservations can be linked directly to Parkonect’s system and kiosks, allowing for seamless integration. When a driver books through ParkWhiz, their reservation data is automatically passed to Parkonect, so the kiosk recognizes their QR code at entry and exit. This reduces manual intervention, minimizes errors, and ensures a smooth flow for both the driver and the operator.
Requirements #
- Parkonect Admin
- Parkwhiz Admin
How it Works #
1. Reservation Created in ParkWhiz
The user books parking through the ParkWhiz platform. As soon as the reservation is confirmed, the data is automatically passed to Parkonect and registered as a presale in the system.
2. Presale Sync with Parkonect
Parkonect receives the reservation and logs it as a presale, including the license plate (if provided), QR code, time/date, and location. This presale entry is what the kiosk or gate system will use to validate the user.
3. Arrival at the Facility
- If the location supports License Plate Recognition (LPR), the system checks incoming plates against the presale list and automatically grants access if there’s a match.
- If using QR code access, the user scans their ParkWhiz QR at the Parkonect kiosk or gate scanner. The system matches it to the presale and allows entry.
4. During the Parking Session
The presale remains active in Parkonect’s system. Users don’t need tickets or to check in, everything is tied to their reservation credentials (plate or QR).
5. Exit Flow
Upon leaving, the system again verifies the license plate or QR code against the active presale.
- If within the reservation window, the gate opens automatically.
- If the user overstayed, Parkonect can calculate overage fees and prompt for payment at the exit kiosk if configured.
Implementation #
Parkonect #
- Log in to the Parkonect Admin portal at https://secure.parkonect.com/
- From the top menu, select Parkonect tab > 3rd Party Sellers > select the garage name from the drop-down menu.
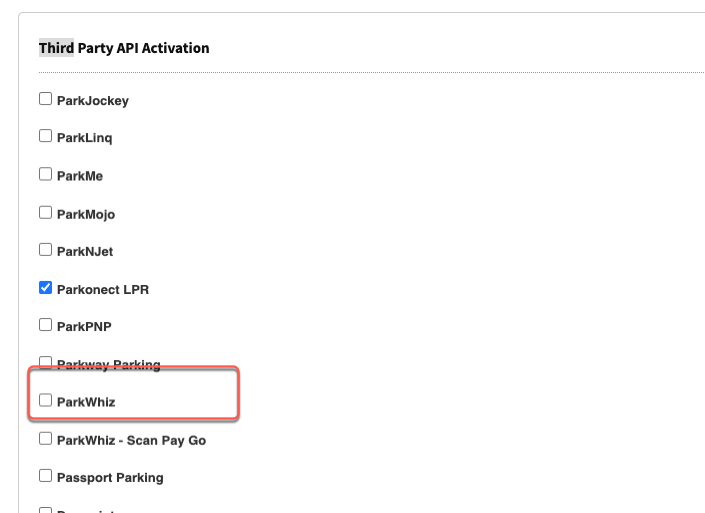
- Scroll down to the Third Party API Activation section > Enable Parkwhiz.

- Update.
Early Entry / Late Fee #
- Go to Garage > 3rd Party Pre-Sales
- Set up Early Entry and Overage.
- Update.
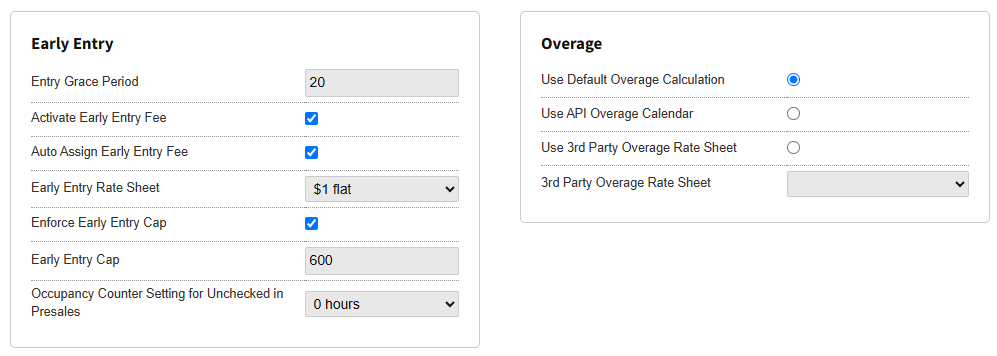
Early Entry:
- Entry Grace Period: Time in minutes a driver can enter ahead of their reservation without being charged.
- Activate Early Entry Fee: Enables a fee for early entry (charged on exit). Must be enabled for Entry Grace Period to work.
- Auto Assign Early Entry Fee: Automatically applies the early entry fee at exit. Must be enabled for Entry Grace Period to work.
- Early Entry Rate Sheet: Selects the pricing used to calculate early entry fees.
- Enforce Early Entry Cap: Enforces a maximum early entry charge duration. Must be enabled for Early Entry Cap to work.
- Early Entry Cap: Maximum number of minutes before a reservation that a driver is allowed to enter (with a fee if outside the grace period).
- Occupancy Counter Setting for Unchecked in Presales: Sets how long the system waits after a reservation starts before counting a no-show presale as occupying a space.
What’s the difference between Entry Grace Period and Early Entry Cap?
Entry Grace Period is the amount of time a driver can arrive before their reservation without being charged.
Early Entry Cap is the maximum time before a reservation that a driver is allowed to enter — if they arrive earlier than the grace period but within the cap, they’ll be charged an early entry fee at exit.
Example:
If a location has a 15-minute grace period and a 240-minute (4-hour) early entry cap:
- A driver who arrives 10 minutes early won’t be charged.
- A driver who arrives 2 hours early will be charged an early entry fee at exit.
- A driver who tries to enter more than 4 hours early won’t be allowed in.
Overage (select one option only):
- Use Default Overage Calculation: Applies Parkonect’s built-in rules for overage fees.
- Use API Overage Calendar: Pulls overage rates and times from an external API schedule.
- Use 3rd Party Overage Rate Sheet: Uses a custom overage rate sheet defined in the dropdown below.
- 3rd Party Overage Rate Sheet: Selects the specific third-party rate sheet to apply (only if the option above is selected).
ParkWhiz #
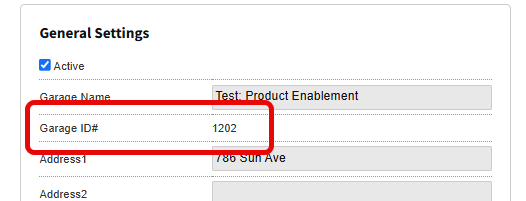
Before proceeding, you’ll need to locate the Garage ID for the Parkonect location. You can find it in two places:
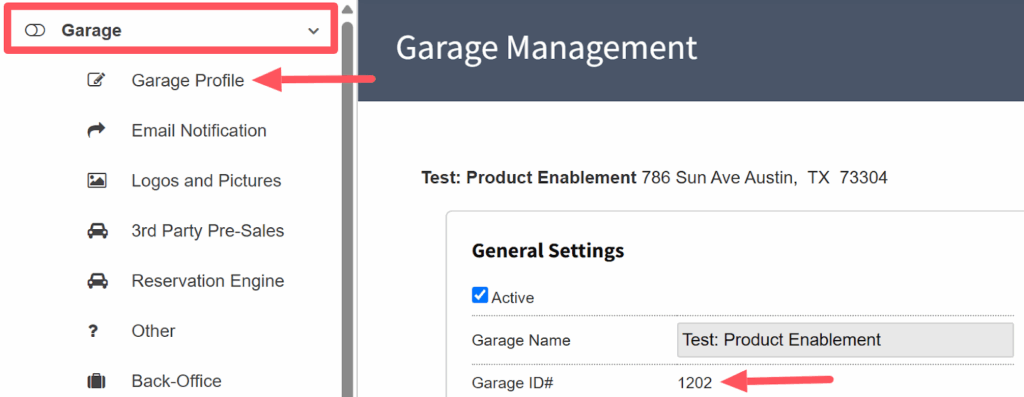
In the Garage Profile #
Go to Garage > Garage Profile — the Garage ID is listed under the Garage Name in the General Settings section.
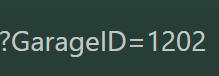
In the URL #
When viewing the garage, check the browser URL, the Garage ID appears after GarageID=
Example: GarageID=1202
- Log in to admin.parkwhiz.com
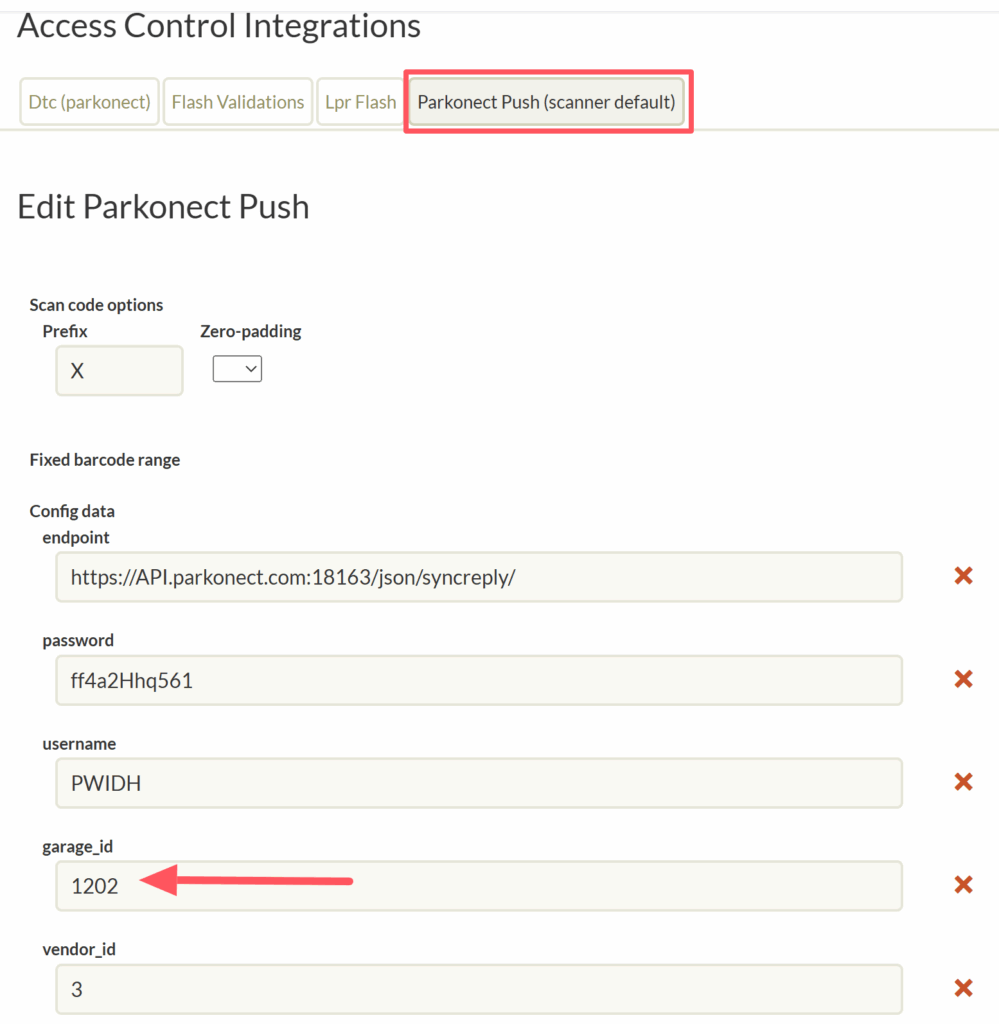
- Navigate to the Location >Integrations tab.
- Select the Parkonect Push (scanner default) tab
- Set up:
- Prefix
- Endpoint
- Password
- Username
- Garage ID (from Parkonect).
- Vendor ID
Compatibility list #
Parkonect PreSales
Reports #
Reservation Summary