Configuration Access #
The following User Types are granted Rate Management access:
- Super Administrator
- Customer Administrator
- Garage Administrator
Create New Rate Table #
1. Select the Garage from main menu > Garage Settings > Rates tab > New Garage Rate Sheet as shown above.
2. Enter the rate bands in the “Add New Rate” section
- Start Minutes = Start of rate band in minutes (first tier always starts with zero)
- End Minutes = End of rate band in minutes
- Rate = Amount to charge per tier
3. Select Add Rate.
❗ Important Note ❗
NOTE: Rate tables must total 1440 minutes (24 hours)with no gaps.

4. Each added Rate band will appear under the Current Rates section. Enter each rate until the total covers the 1440 minutes for the 24 hour day.
Rate bands should not overlap, example below:
- 0-60
- 61-120
- 121-180
- 181-1440

Here we can see the example built out for the full 24 hours.

The following are necessary when adding a new rate sheet
- All rate bands are measured in minutes. Each new band starts one minute after the previous band ends. For example, if the first rate band is 0 to 30 minutes, the next rate band must start at 31.
- Rate tables must total 1440 minutes with no gaps.
- When adding a new band, note that the new rate is added to the gross rate of the previous band.
- You may only have one default rate sheet at a time.
Create Specials #
Adding specials, like Early Bird or Evening Specials to a rate sheet is simple. While editing the rate sheet, scroll down and click the “Add New Special” box.
❗Note ❗
You must complete any specials prior to saving the rate sheet.
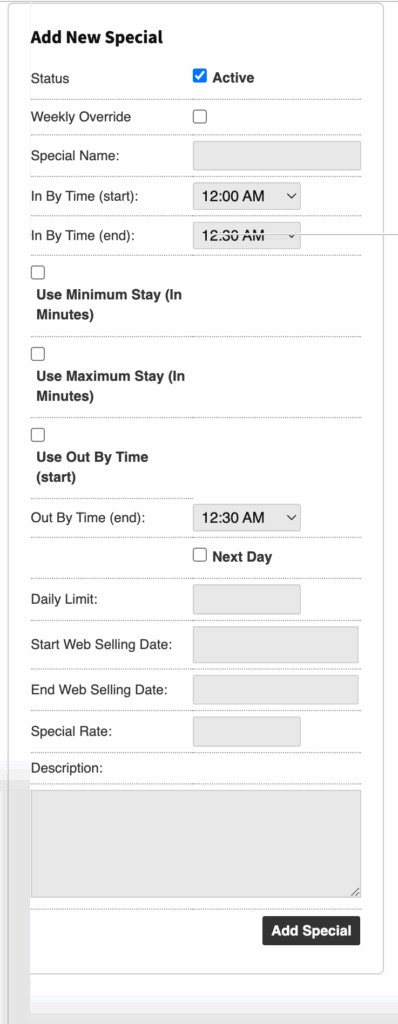
The following options can be configured:
- Status
- Check Active to enable
- Weekly Overide
- Enabled the Weekly Specials settings
- Special Name
- In by Time (start/end)
- A parker must enter the garage between these times to qualify for the special.
- Out by Time (end only)
- A parker must exit the garage before this time to qualify for the special.
- Out by Time (start and end)
- By checking the “Use Out By Time Start” box, you will create a window in which the parker must exit the facility between specific times to qualify for the special.
- Out by Time (next day)
- Check this box to configure the out by time for the next day. For example, an evening special parker must exit by 7 AM the next day.
- Daily Limit
- Limit the number of uses per day. If no limit is needed, please put 1000.
- Minimum Stay
- Check this box to configure a minimum stay for the special. A parker must stay for a minimum of x minutes to qualify for the special. In by and out by times must still be specified.
- Start Web Selling Date
- Input the date to configure special availability.
- End Web Selling Date
- Input the date to configure special expiration parameters. If you do not want the special to expire, please put 2050 as the year.
- Special Rate
- Input the amount the customer will be charged if they qualify for the special.
- Description
- Notes and description regarding special
- To save your changes, click “Save Rate Sheet”.
Example: Parker must enter the lot between 3 AM and 6 AM, stay parked a minimum of 3 hours, and exit by 4 PM to be charged $12. If they do not, then they will be charged the normal rates.

On your Rate Detail page, you’ll now see the updated data as seen below.

Related Settings #
Grace Periods #
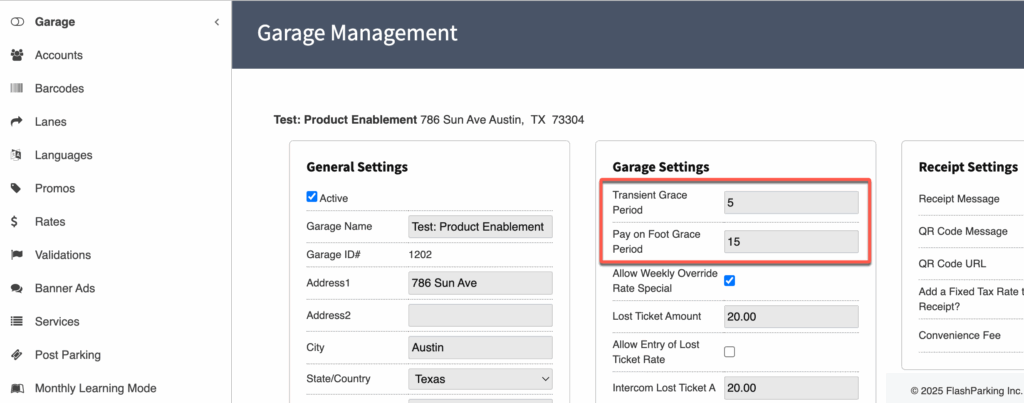
Transient Grace period #
The Transient grace period is the amount of time a parker has to enter and exit the garage without being charged anything.
POF Grace Period #
This is the time allowed for the parker to exit the garage after paying at a POF station.
If they exit after the POF Grace Period ends, time resumes accruing and they may be charged an additional fee.
Grace Period Configuration #
The Grace Period is set at the Location level under the Garage Profile tab.