
Check the main Parkonect Logical Zones article for more info.
Requirements #
- Ver. 4.17.00 and up.
- Super user, Garage Admin user, Customer Admin user.
- Logical Zones Module.
How to Configure #
Before proceeding, note that adding or removing logical zones after the initial configuration is complete may affect the existing lane and rate configurations.
Modules #
Logical Zones Module #
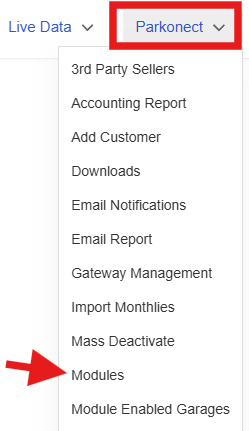
- Go to the Parkonect Admin portal and click the Parkonect tab at the upper right-hand side of the screen > click the Modules option.
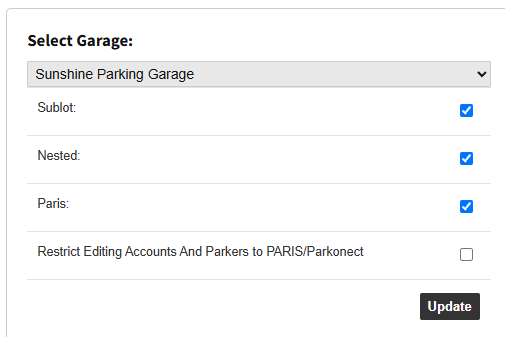
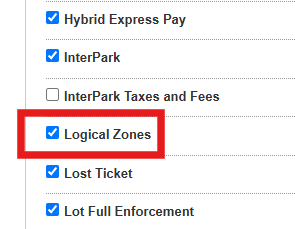
- Select the desired garage from the dropdown list and, once the modules list populates, check the Logical Zones flag > click the update button below the garage selection dropdown.
Be aware that the Event Prepay Module is not compatible with Logical Zones.
Adding Logical Zones to the Garage #
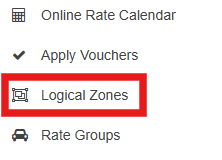
After activating the Logical Zones module, new options named Logical Zones and Rate Groups will be available under the Garage Settings tab. Click the Logical Zones option to start.
A Default Logical Zone is automatically created when activating the LZ module. Even after creating more Logical Zones under the garage, an LZ must always be marked as the Default.
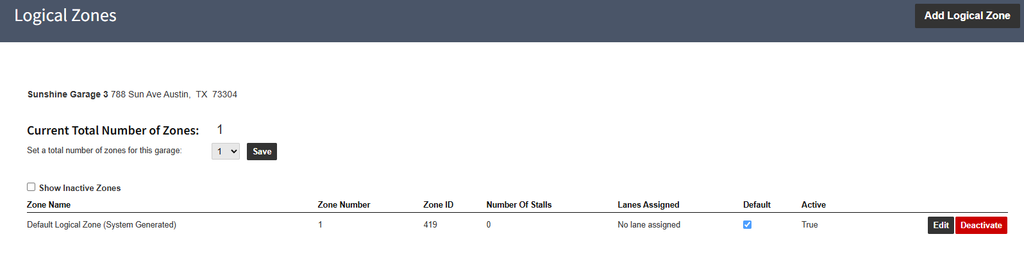
- Click the dropdown to select the maximum number of Logical Zones that will be in the garage and click the Save button.
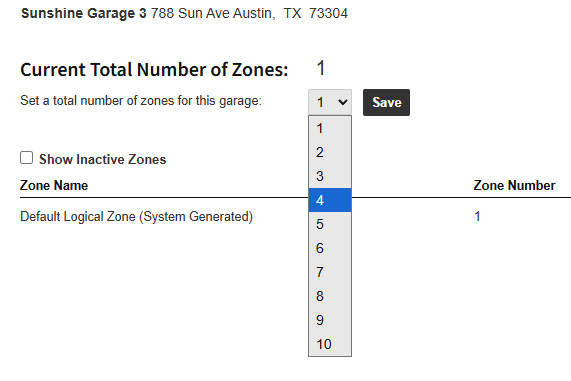
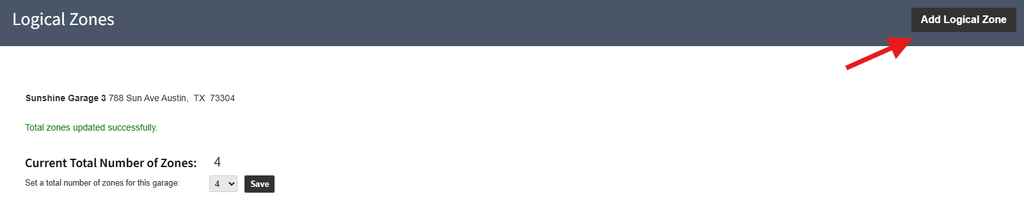
- Click the Add Logical Zone button on the top right-hand side of the screen to start adding LZ’s.
- Choose a Name and Number for the LZ > click the Save button at the top.
The Number of Stalls field does not need to be edited.
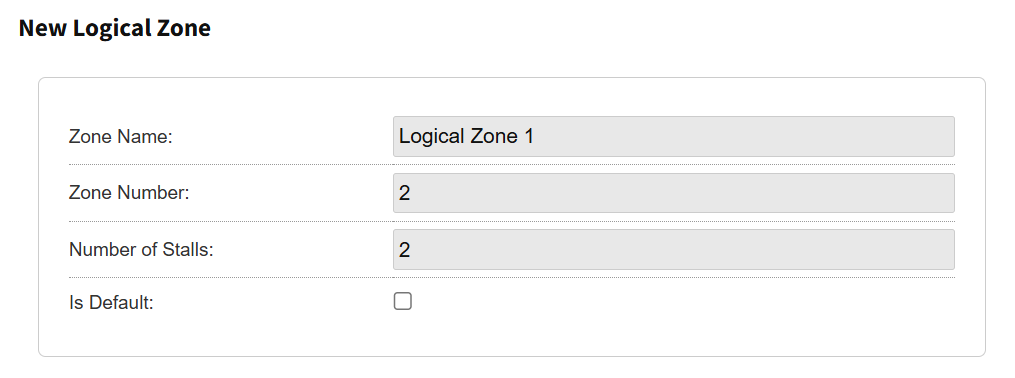
Is Default flag: Whenever setting up a Lane, if the Default flag was checked, this is the LZ that will be pulled to that lane. If no overage default zone is selected, the lane will be assigned to whatever zone has been defaulted this way.
Rates #
Rate Sheets are assigned to each zone, while a Rate Group applies to the entire garage. If the Pin Rate Sheet on Entry module is active, these groups are assigned to one or more Logical Zones in the garage at creation or as needed.
Rate Sheets #
To create a new Rate Sheet or Special Rate Sheet, follow the steps from the Parkonect Garage Management on how to add a new Rate Sheet.
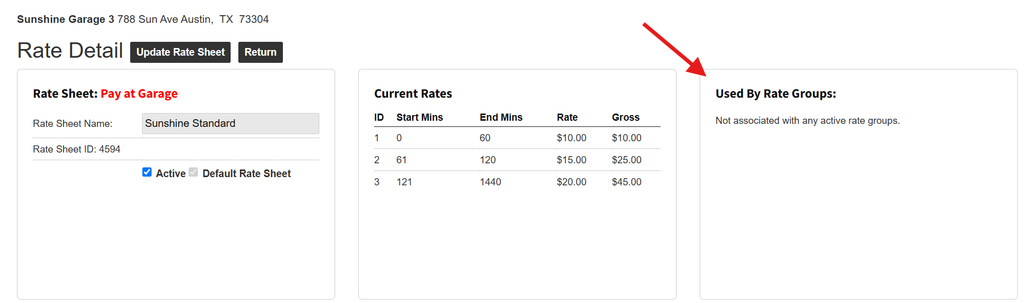
A section named Used by Rate Groups is available to look at what Rate Groups use the selected sheet. Rate Groups are in turn assigned to Logical Zones to use the rate Rate Sheet.
Rate Groups #
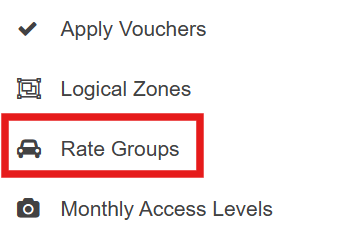
The Rate Groups option will appear in the Garage menu once the Logical Zones module is activated.
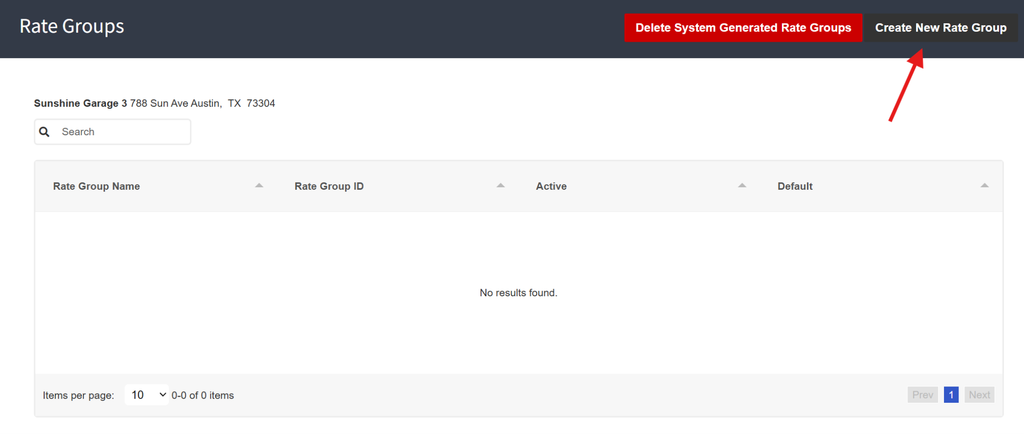
- To add a new Rate Group, click the Create New Rate Group button on the upper right-hand side of the screen.
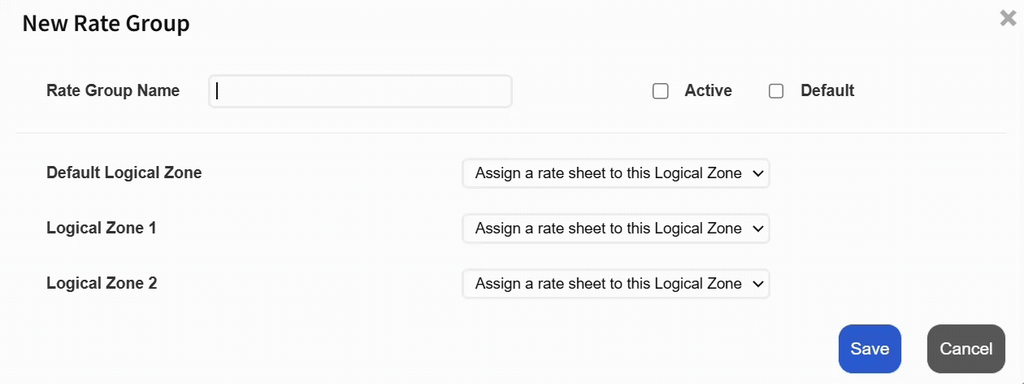
- A New Rate Group pop-up will appear with a list of all available LZ already created to select a Rate Sheet for every LZ for the garage. Name the Rate Group and check the Active flag.
- After clicking Save, the new Rate Group will appear in the Rate Group list. By clicking the Rate Group, the user can check or uncheck the Active flag to turn the group off, or change it to a Default or Non-Default Rate Group.
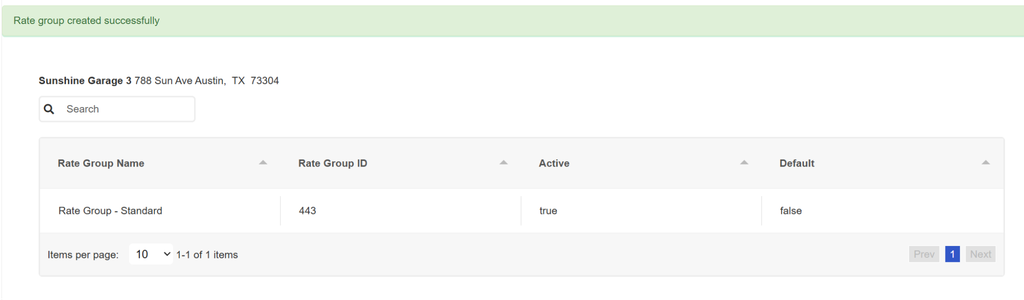
After the Rate Group is created, Rate Sheets assigned to LZ’s cannot be changed. A new group will have to be created to do so, and the previously Active group must be placed as Inactive by unchecking the corresponding flag. The Rate Group will remain in the list although it won’t be used unless placed as Active again.
Delete System-Generated Rate Groups #
When an existing garage enables the Logical Zones module for the first time and has no existing Logical Zones, all system-generated rate groups are displayed on the Rate Groups page. These rate groups are configured for the garage’s default Logical Zone only. As additional Logical Zones are created, the system-generated rate groups are no longer relevant because they do not apply to the new zone configuration.
A dedicated button for soft-deleting the system-generated groups is available in the Rate Groups page.
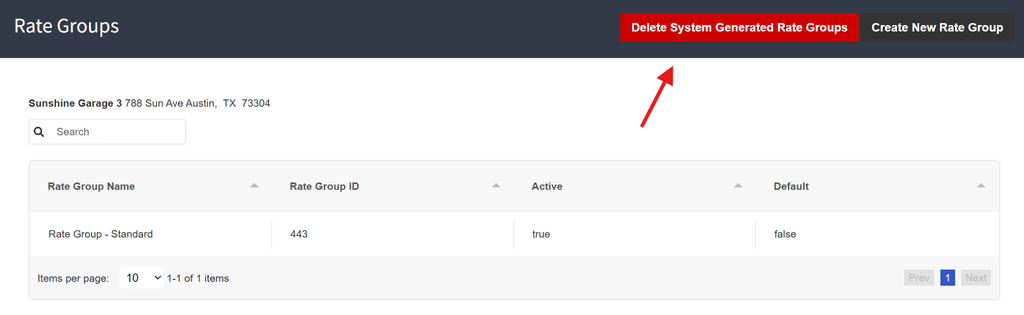
- By clicking this button, all automatically created Rate Groups will be deleted.

- A pop-up to confirm the deletion of all groups is presented and must be accepted to proceed.
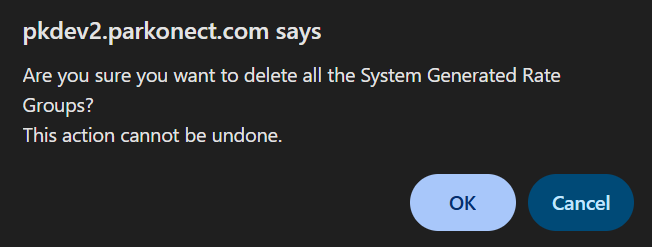
- Once completed, all system-generated groups will be deleted.
This button only works for soft-deleting automatically generated groups; manually created groups by the user must be placed as inactive and cannot be deleted.
Pin Rate Sheet on Entry Module – Optional #
Lanes can have a rate group specified in the lane configuration section; this is the rate group that will be assigned to that lane.
- To activate the Rate Group dropdown, go to the Parkonect tab and click Modules > select the garage from the dropdown and mark the Pin Rate Sheet Group flag, then click Save.
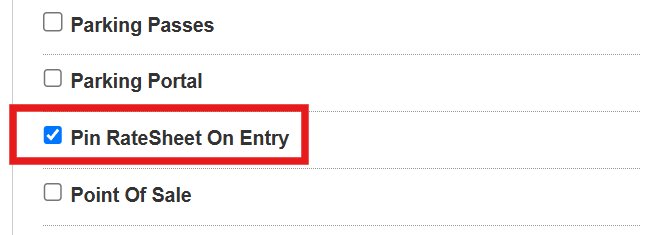
- The Rate Group dropdown will become available in the Lane Settings section.
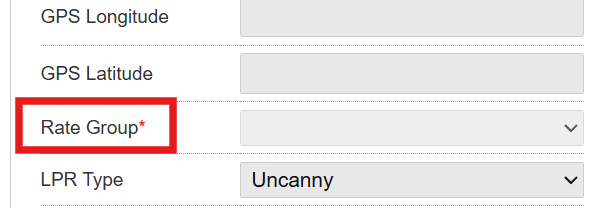
Check the Rate Groups section below in this article for how to configure rates for Logical Zones.
Assigning Lanes #
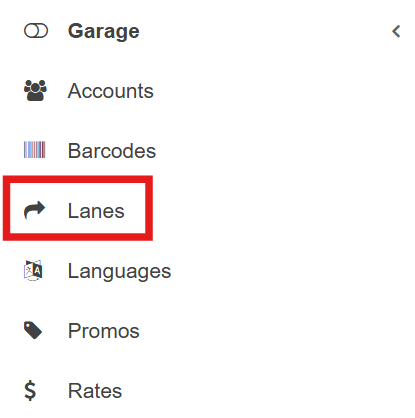
- Go to the Lanes option in the left-hand side menu.
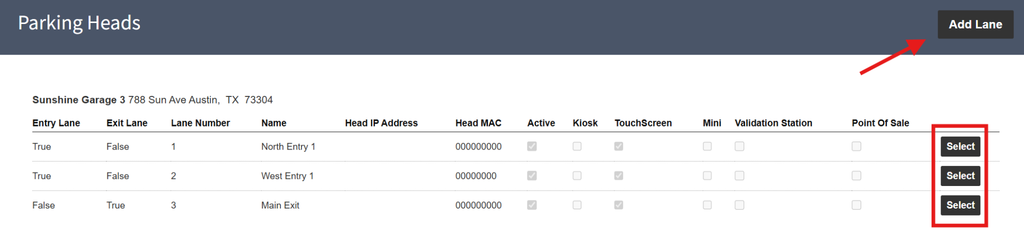
- Click the Add Lane button or Select and existing lane to be assigned to the LZ.
- Configure the lane with the desired options for the lane > select the logical zone for the lane from the Logical Zone dropdown. Alternatively, you can mark the Logical Zones Transfer Station flag if the lane is to be a transfer station.
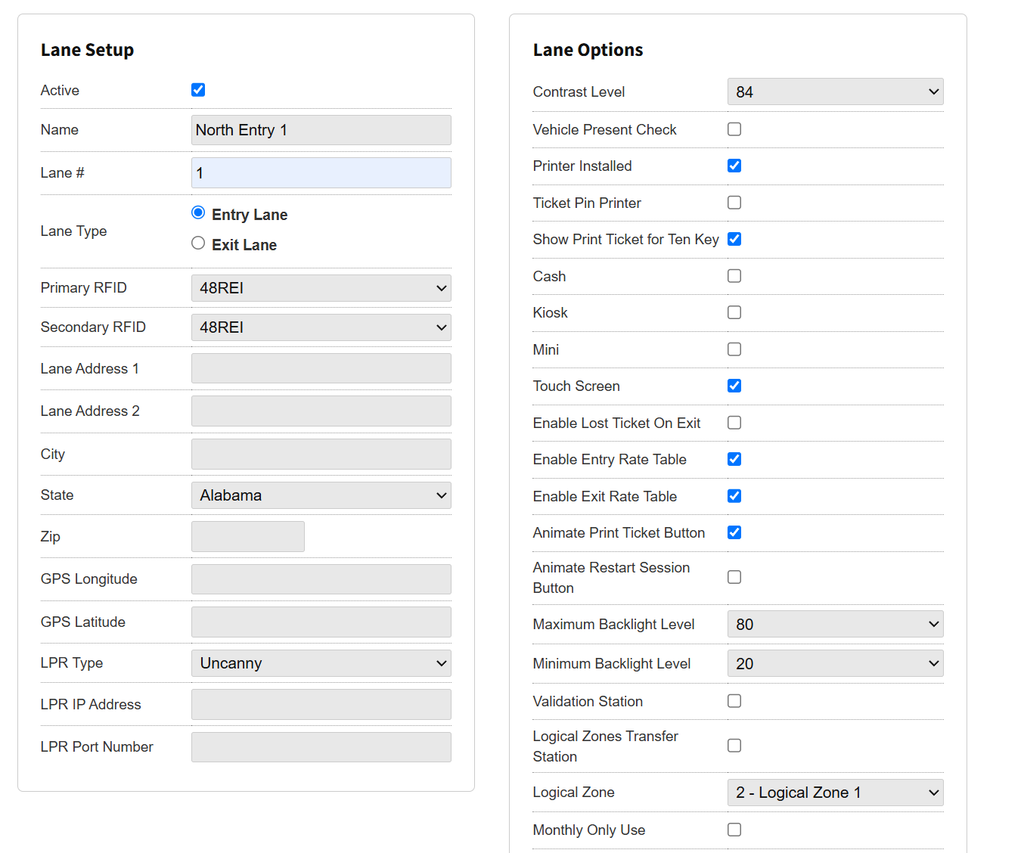
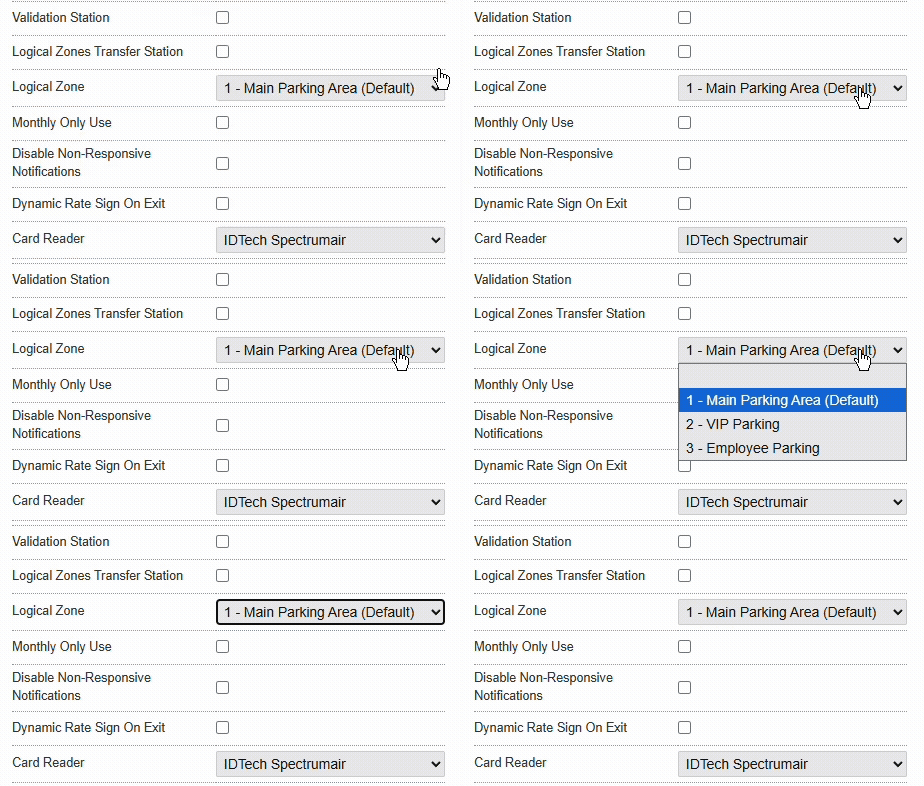
Exit lanes do not allow logical zone assignment, since exits are considered general exits for the garage.
Transfer Stations #
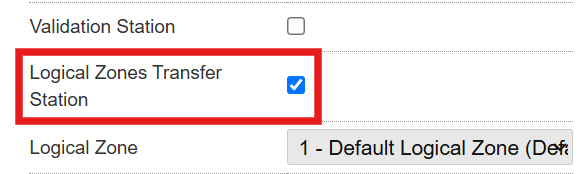
If a lane is flagged as a Transfer Station, the Logical Zone assigned from the dropdown is the lane that the parker will be transferring to by passing through the lane.
Be aware that License Plate corrections in the event log cannot be performed in the activity generated when a plate passes through a transfer station. License Plate corrections must be done in the LPR read on the main Entry or main Exit, see License Plate Corrections.
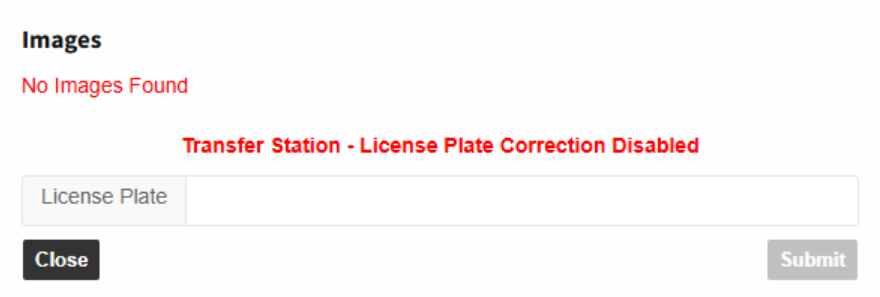
A lane becomes a transfer station when the Logical Zones Transfer Station is marked.
By default, parkers are charged the rate for the zone in which they stayed the longest; e.g., if a parker spent 10 minutes in zone A before transitioning to zone B where they stayed for 20 minutes, their parking session will be measured according to the rate for zone B.
The Zone Assignment Period flag lets the parking administrator input a number of minutes for the zone; if the parker’s duration in this zone is equal to or greater than the input minutes, they will be charged according to the rate for that logical zone, even if they spend more time in another logical zone where they transferred.
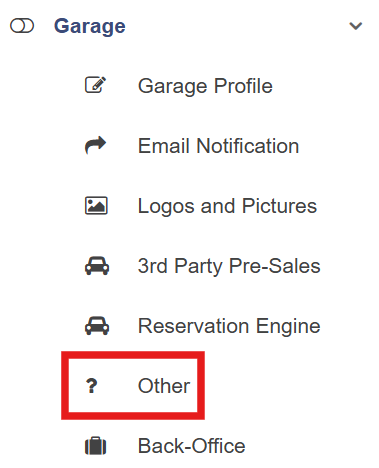
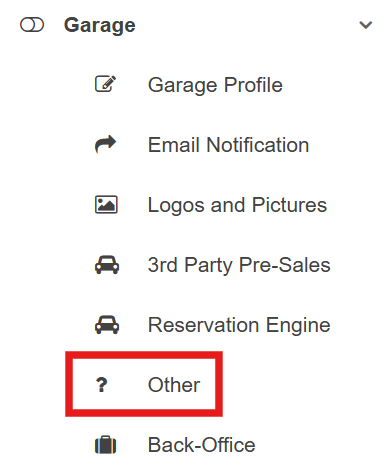
The Zone Assignment Period flag can be found in the Garage tab > Other option under the Other section.
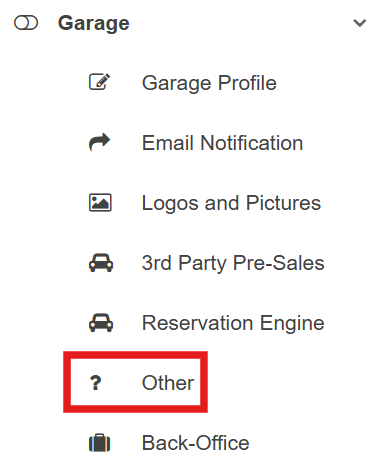
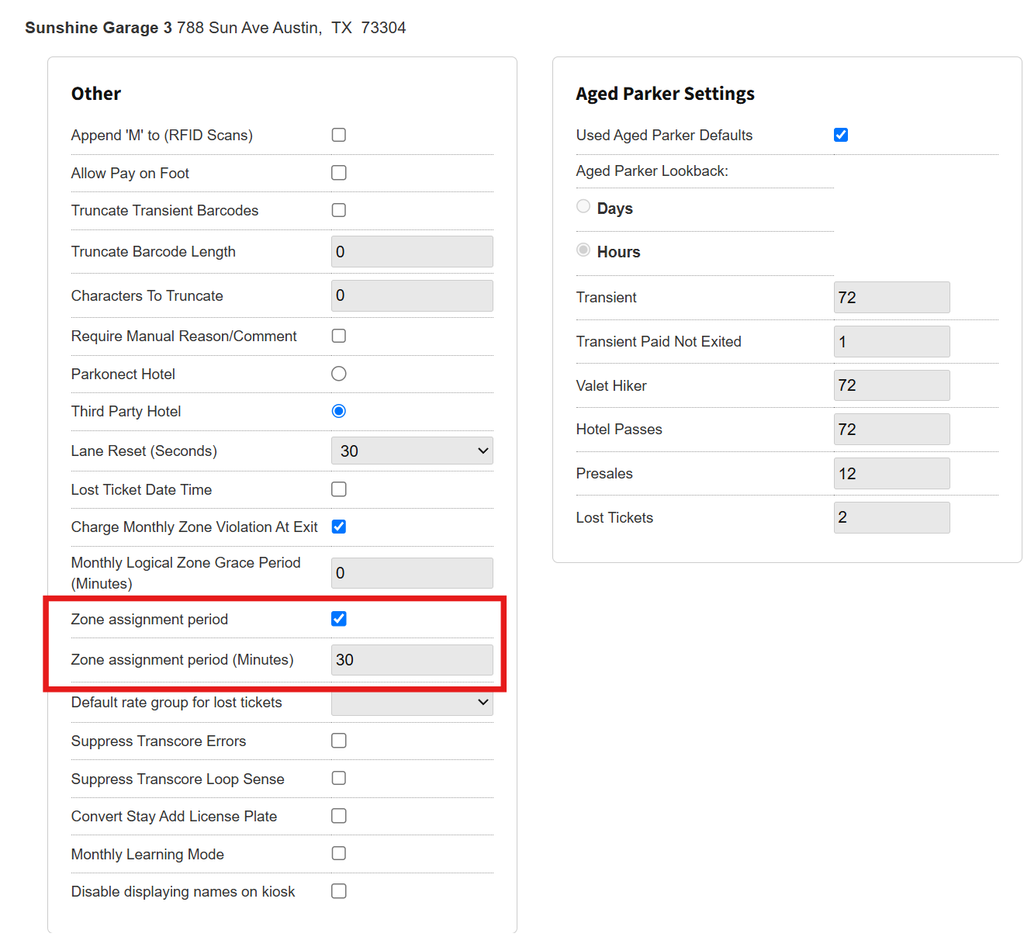
When activating the Zone Assignment Period flag, changes are made to all Logical Zones for the garage.
Enforcement #
To select enforcement options for monthly accounts in Logical Zones, enable Logical Zone Restrictions in the Account Information section on a monthly parker’s account.
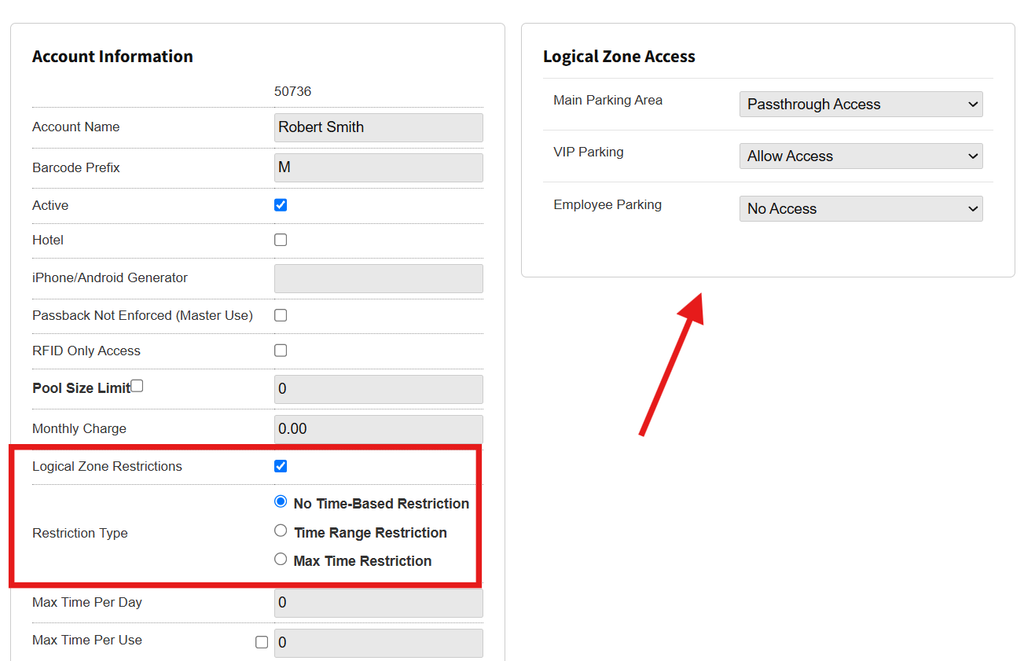
Overstaying triggers an overage charge at exit, which can be configured to be notified at exit (see Overage configuration section). All zone violations are automatically logged for reporting.
Select a Restriction Type #
Select only one of the following restriction types to accommodate the Parking Operator request.
No Time-based restriction #
This restriction type does not have a time-based setting such as the other options. The monthly parker is not limited to certain days of the week, hours, or parking duration.
Time-Range Restriction #
- Selecting a Time Range Restriction will display a time selection along with an LZ zone selection section, where the parking operator can specify the times when the parker is allowed to park in the Logical Zone.
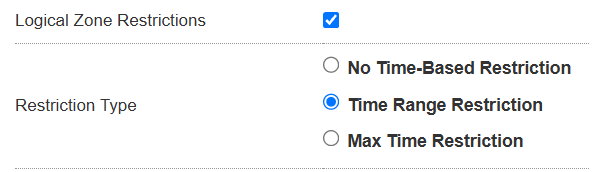
- Customize the desired start date and time, and the end day and time, along with Logical Zone access.
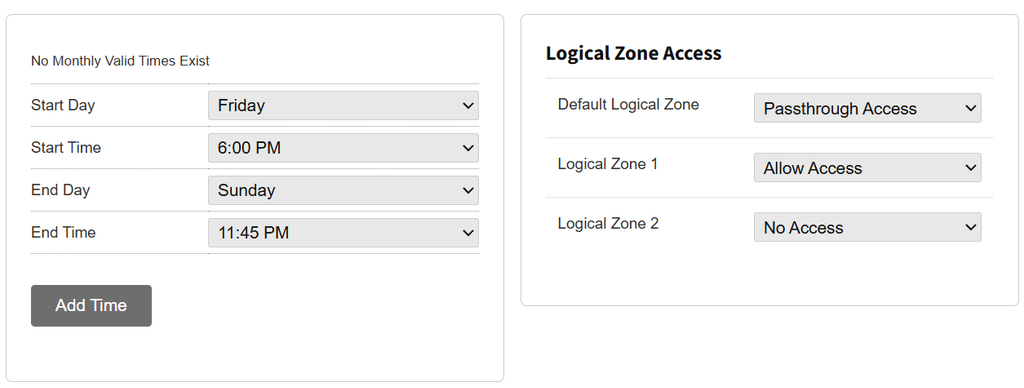
- To save the configuration, click the Add Time button. This will save the selected time frame and open a new configuration if the user wants to add another one.
Max Time Per Day #
Max time per day will allow the monthly parker to have a maximum time (minutes) selected by the operator, tied to the specific LZ from the selectable dropdowns.
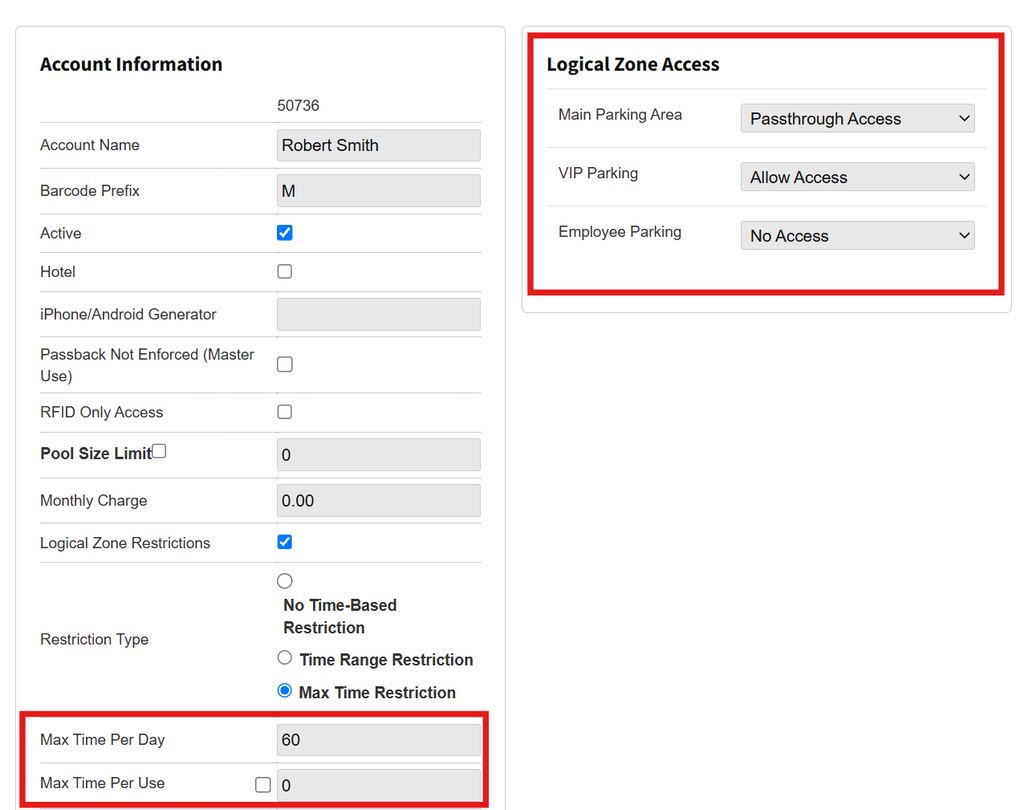
a grace period for zone transitioning can be selected in the Other section for the Garage Settings.
Logical Zone Access #
The Logical Zone Access menu allows setting access rules for each of the available Logical Zone Access, by selecting a restriction from the dropdown menu for each LZ previously configured for the garage. These can be paired with any of the available Restriction Types.
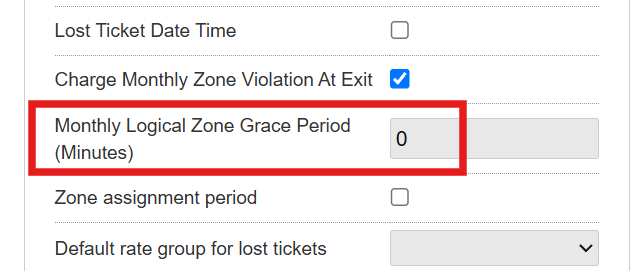
- Passthrough: Parkers can enter/access a zone and then move to other zones, but they cannot park/stay longer than the “Monthly Logical Zone Grace Period” set in minutes threshold (Garage Settings) or another zone(s) they have access to without it being a zone violation.
- Allow Access: Can access this logical zone.
- No Access: No access to this logical zone.
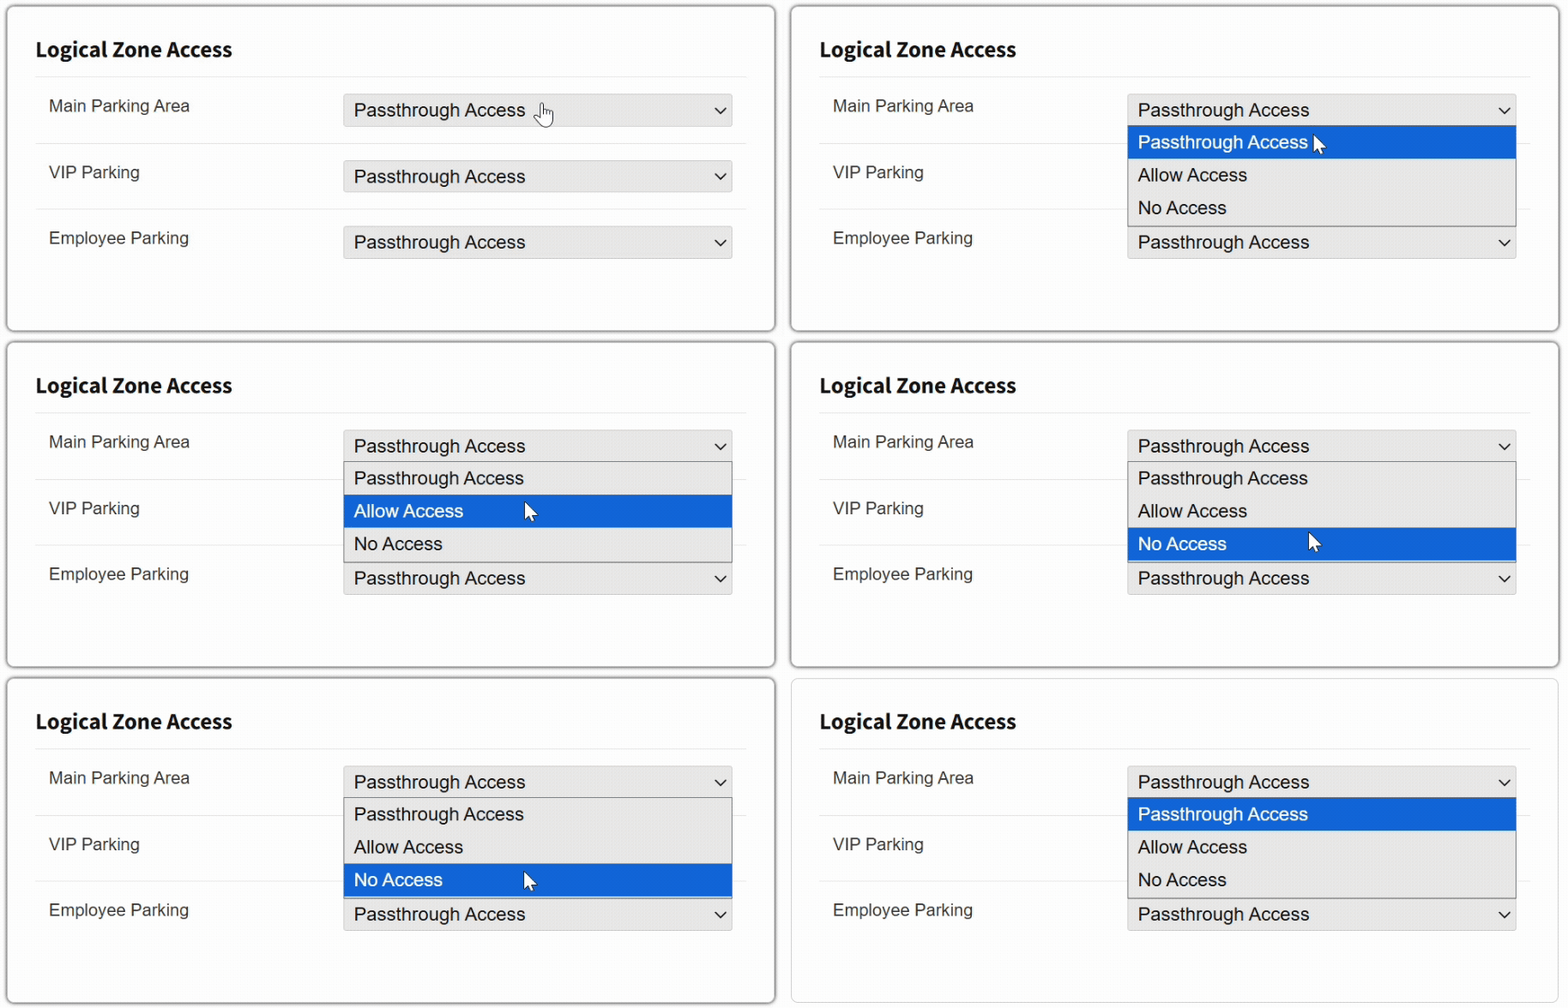
If the “Monthly overage charge at exit” flag is not active (Garage Settings → Other) and Logical Zones are enabled, monthly parkers with overages will be able to leave the garage without paying at the exit lane.
If “Monthly overage charge at exit” is active, Monthly Parkers will have to pay any overages before exiting the garage.
Monthly Logical Zone Grace Period (Minutes) #
- To add a grace period to Logical Zones, go to the Other options in Garage Settings > select the desired grace period in the Monthly Logical Zone Grace Period (Minutes) field.
Parkonect and 3rd Party Presale Overages #
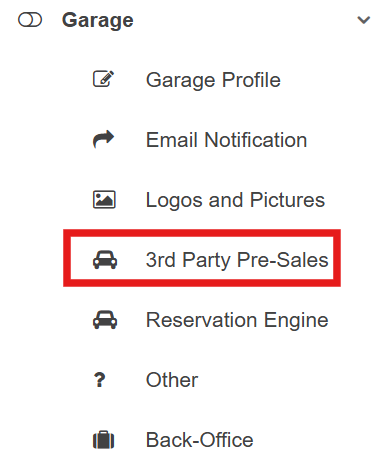
For Parkonect and third-party overage reservations, the Overage section can be found in the 3rd party Pre-sales option under the Garage tab.
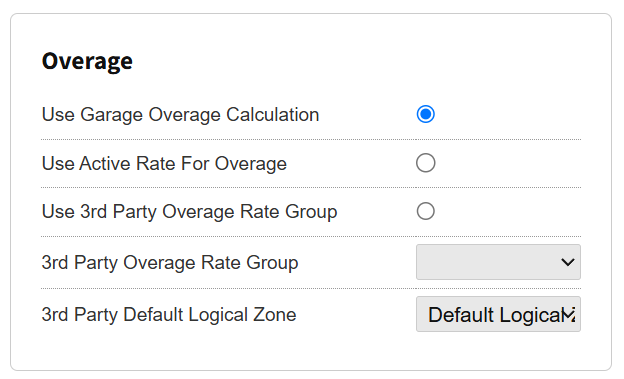
- Use Garage Overage Calculation: Uses the default rate group for the garage.
- Use Active Rate For Overage: When the parker enters, the system will stamp the rate group assigned at entry for overage.
- Use 3rd Party Overage Rate Group: Allows the garage admin to assign the overage rate group manually from the dropdown list.
- 3rd Party Overage Rate Group: Dropdown list for manually selected groups.
- 3rd Party Default Logical Zone: Dropdown list for manually selected logical zones.
- When marking the Use 3rd Party Overage Group flag, if no rate group or default logical zone is selected from the dropdowns, the system will choose the group and LZ that were selected as defaults in the Logical Zone and Rate Groups sections.
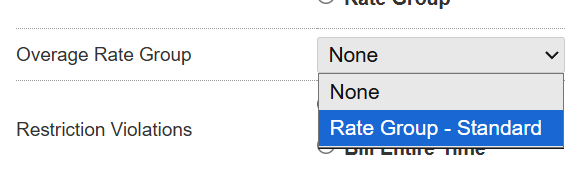
Overage groups can also be assigned to monthly accounts by going to the monthly accounts page and selecting the Rate Group from the Overage Rate Group dropdown.
Charge Monthly Zone Violation At Exit #
If this flag is checked, when a monthly parker has a logical zone violation and scans at the exit, the monthly parker will be charged at exit; if this flag is not checked, they will be let out at the exit, and then an email or text will be sent to the parker to collect the amount due for the violation.
- Go to the Other section for the Garage.
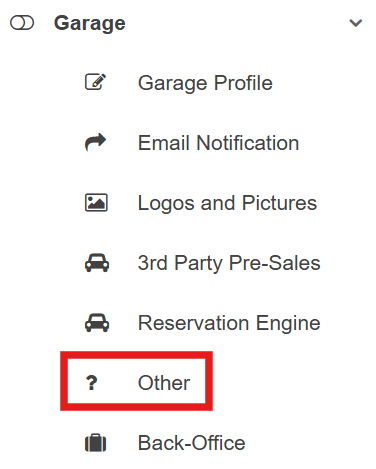
- The flag can be found in the Other category box.

Overage e-mail Alerts #
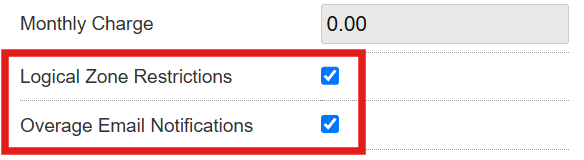
To notify operators of overage and zone violations incurred by parkers, the Overage Email Notifications flag must be checked.
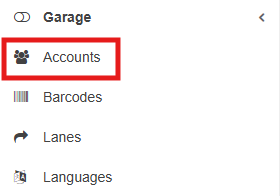
- The Logical Zone Restrictions and Overage Email Notifications flag must be enabled under the Accounts settings.
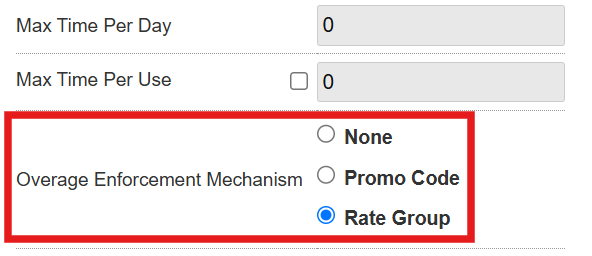
- The Overage Enforcement Mechanism (Rate Group) must be enabled.
- Click the Update button at the top of the Account page. Note that changes will be made to all cardholders under the account.

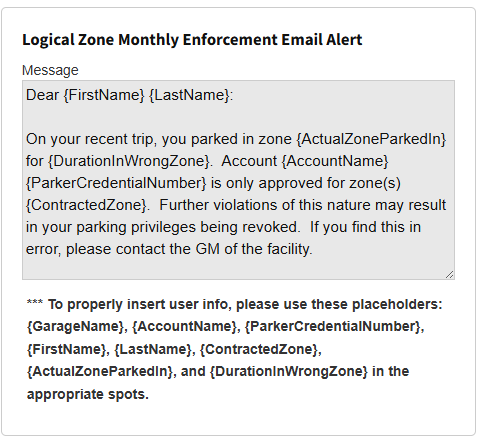
- Operators can use the template loaded by default or modify it. Overage email alerts can be configured in the Others section for the Garage Settings.
The following information must be included in the email:
- First name
- Last name
- Zone parked in
- Account name
- Parker credential number
- Contracted zone
- Duration in wrong zone
- Violation Fee
Early Entry Cap #
Only Super Users can configure a set number of minutes to allow early entry for TPO’s (third-party orders). To activate this feature, admins must check the Enforce Early Entry Cap checkbox.
- Go to the Garage tab under Garage Settings > click Third-Party Presales.
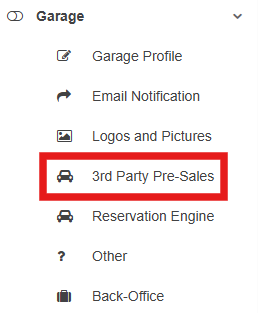
- Check the Enforce Early Entry Cap option and enter the desired time.
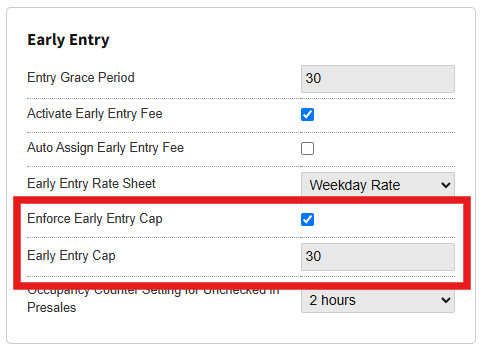
The early entry cap is configured to allow access to barcode scans and LPR entries, regardless of the Logical Zones module being active for the garage.
Parkonect recommends that the early entry cap be set between 4-6 hours, as any patron arriving more than 6 hours before a reservation should be manually handled.